Pages

Friday, February 28, 2014

Inky Paws Challenge- Go Green!

Good morning!

Today I'm playing along with Newton's Nook Designs latest Inky Paws Challenge!  It's a fun one:


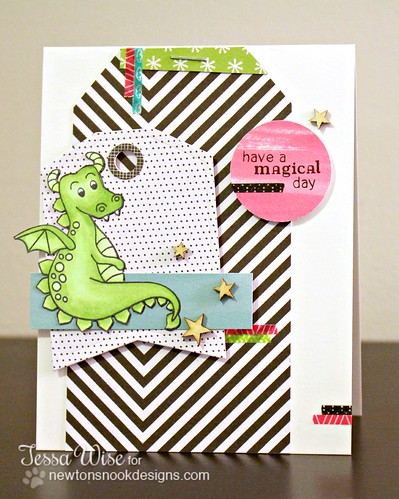
Yep- we are featuring all things green this month! :)  I pulled out the fun Magical Dreams set for this one:

Green Dragon Card 2

That cute dragon was just calling to me!  Hee!  I wanted him to be my focal point so I colored him green with my Copics.  I was going for a black and white with a pop of color look but I ended up with a few pops of color!  The patterned papers are from the Plus One 6x6 pad by Amy Tangerine for American Crafts.  I pulled out those fun narrow washi tapes again, too!  The smaller tag die is from Reverse Confetti- I just can't stop using it!  I love the shape.  I also added a few wooden stars from Studio Calico.  

I'm happy with how this little guy turned out!  It was fun to start with one color as my inspiration, too!  Don't forget to pop over to the Newton's Nook Designs Blog to see what the rest of the design team created.  You can play along, too- don't forget to link up to their blog for your chance to win!

Hope you have a great day!

-tessa

Thursday, February 27, 2014

Keep On Card

Hi!  Only one more day till I'll be cropping the night away at my favorite retreat!  I still have a few things to pack but I mostly know what I want to work on so it shouldn't take too long! :)  Hee!  I always have the tendency to pack everything!

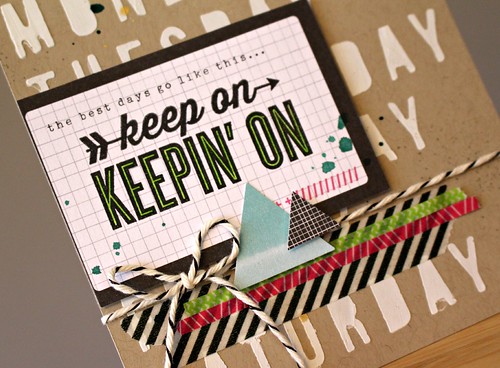
I thought I'd share a card I created recently- I had a bunch of new goodies I wanted to play with and kind of mish mashed them together,  It's a little wacky but I kind of like it!

Keep On Card 1

I started with a kraft card base and then added the days of the week from one of the Basically Essential stencils by Teresa Collins Designs.  After the modeling paste was dry, I splattered it with gold and teal mist.  I also used my spritzer and a kraft marker to add a fine mist to a few areas.   Next, I added some washi tape- the black and white stripes are from Teresa Collins Designs and the mini strips are from the new Amy Tangerine Collection- I had to have them!  The colors are so bright and happy!  The card I added my sentiment to and the patterned papers are also from the same collection.

Keep On Card 2

The sentiment is from the Hustle stamp set by Mama Elephant.  I stamped it with black Memento and then colored inside the letters with a green Copic marker.  Once I added the sentiment card, I added a bit of twine and then used my new Stampin' Up! triangle punch to create the patterned paper triangles.  So glad I picked this up!

Well, I told you I mish mashed a bunch of goodies together! lol!  I did enjoy making it though! :)

In other news, I got a fun package in the mail yesterday:


Thanks again Xyron for the fun Teresa Collins products!  I've already started to put them to good use! :)

Hope you're having a great day!  Thanks for stopping by!
-tessa

Sunday, February 23, 2014

Happy Happy Happy Birthday Card

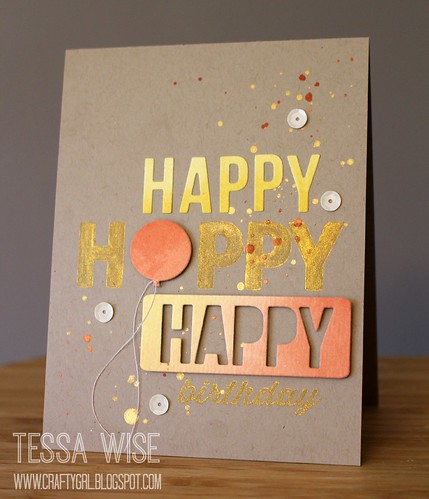
Hello!  I'm enjoying some quiet time before the season finale of Downton Abbey and thought I'd pop on and share a card I made yesterday- I was inspired by the most recent AEI♥U Challenge to create a birthday card.  I pulled out my Fill In The Blank goodies (thank you JJ!) and created this card:

Happy Birthday Card 1

I had a modern shabby chic look in mind with lots of gold and watercolored elements.  I think it turned out pretty close to what I had in mind- with a few extra splatters of gold mist!  Sometimes you just can't control that stuff! Hee!

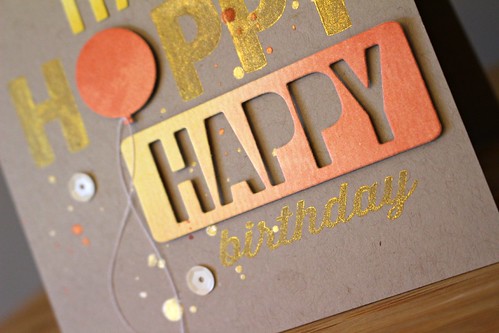
Of course, the Fill In The Blank dies and stamp sets are from Avery Elle.  I used the Stampin' Up! Watercolor Wonder DSP for my diecuts- the watercolored papers are so pretty in this collection!  The gold ink is my favorite- Delicata Golden Glitz.  If you don't have this, you need it!  I used Heidi Swapp Color Shine in Gold Lame and Georgia Peach for my splattering and the sequins are from Teresa Collins Designs Santa's List collection.

Happy Birthday Card 2

I'm so glad I found time to play along with the challenge- it's Avery Elle's first on their new AEI♥U Challenge blog.  So fun!

Well, I better wrap this up- Downton Abbey is on in just a few minutes now.  I can't believe it's already the season finale!  The season went by so fast- I wish it was a little longer!

Hope you have a great week!

-tessa

Friday, February 21, 2014

Teresa Collins Save The Date Cards

Hello!  I had some cards up on the Teresa Collins team blog this week using the beautiful Save the Date collection.  This collection is so pretty- I love using it for cards!  I thought I'd share them here too.

My first one showcases the pretty papers from the Save the Date collection:

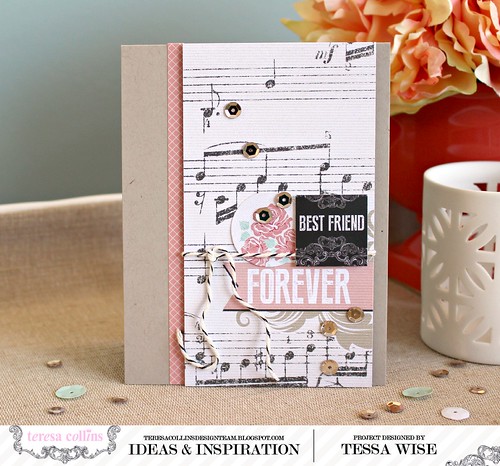
Best Friend Card 1

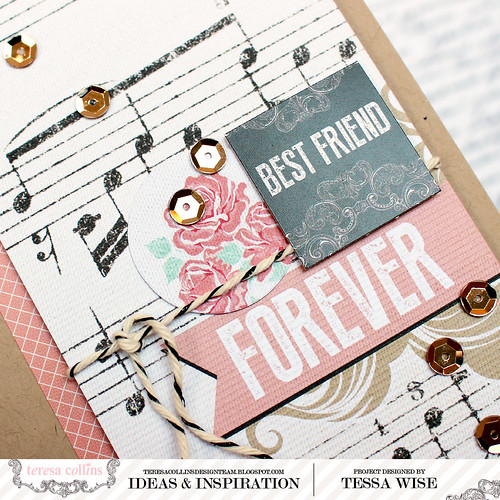
I started with a kraft card base.  I added a panel of the music print paper (Our Song) that I had cut from the bottom right corner of the sheet to include the forever bit.  I created a cluster of embellishments around the forever- a bit of metallic black baker's twine, the best friend sticker, and the roses diecut from the ephemera pack.  I added it to my card front using foam adhesive dots and added the sticker strip to the left edge.  I added some pretty sequins to finish off the look.

Best Friend Card 3

The texture in the 12x12 sheets is so pretty!  I love how it adds a bit of luxe to every project I create with it!

My second card showcases one of the new overlays from the Save the Date collection:

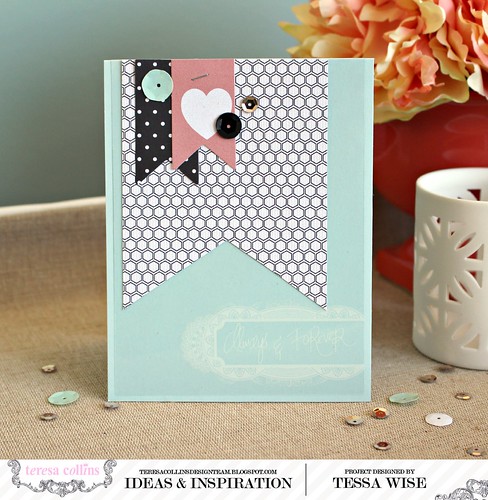
Always And Forever Card 1

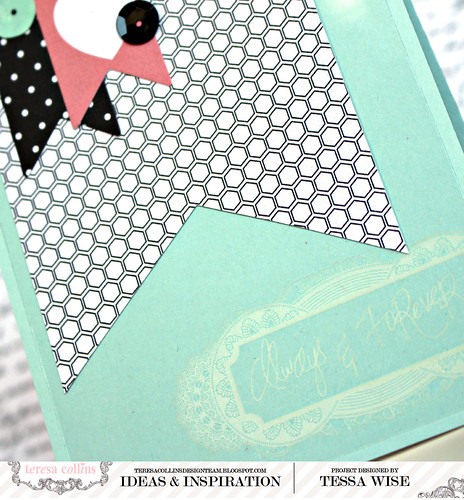
I chose the overlay that said always and forever because I thought it would make a fun sentiment.  I cut it to fit my 4.24 x 5.5" card base and adhered it to the front using adhesive only where it would be covered by the next layers.  I added a large banner of the small hexagon print (Just Married) next and then added the small banners over the top of it.  They are both from the Ephemera pack.  I added a small staple to the heart one and then embellished with a few of the sequins I love so much!

Always and Forever Card 3

The overlays look great on cards- they are shiny and add another dimension of texture!

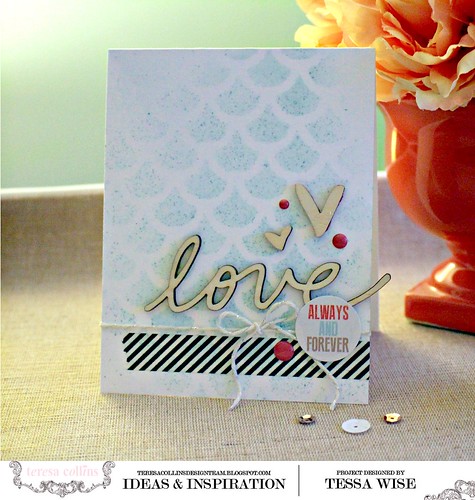
I had a lot of fun with my last card!  I pulled out the pretty scalloped mask from the Basically Essential line to create the background on it:

Wooden Love Card 3

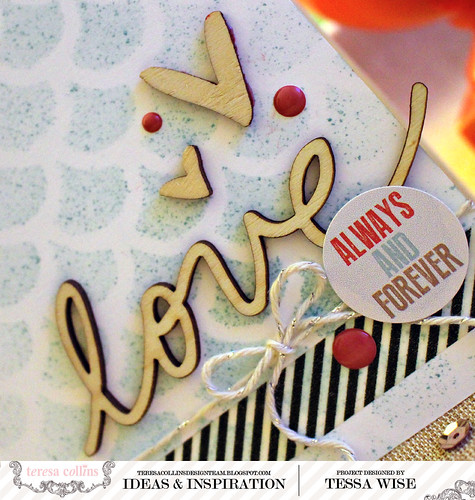
I love Teresa's new stencils!  There are just so many things you can do with them!  This time I pulled out my spritzer and a pretty blue marker.  I created the speckles first and then went back and added a bit of matching blue ink with a sponge to make the color pop under my main cluster.

I added a strip of the striped washi and then adhered the wooden pieces.  Then I added a bit of twine and a few enamel dots next and then finished it off with the always and forever sticker.  It just turned out so pretty!

Wooden Love 4

The Save the Date collection is such a beautiful one!  It always makes me happy to pull it out and create!

Hope you have a wonderful day!

-tessa

Thursday, February 20, 2014

Newton's Nook Designs February Release- Newton's Birthday Bash


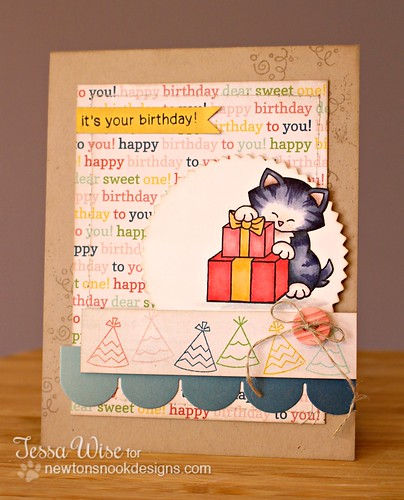
Hello!  Today is day three of the Newton's Nook Designs February Release!  We are featuring the Newton's Birthday Bash set today- my favorite of the release!!

Birthday Kitty Card 1

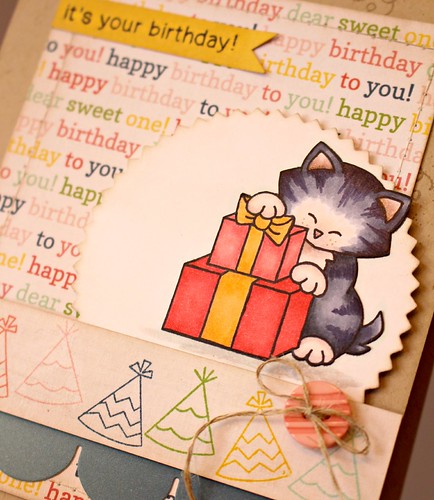
I chose the kitty with some presents image to feature on my card today.  I colored him using Copic markers and even tried a new furry technique!  I like how it turned out!

You can see some other fun images from the set here as well. I added some confetti on the card base just behind the patterned paper panel.  The hats are also stamps- I added a line of them in different colors to a strip just below the main image.

Birthday Kitty Card 2

I just can't get enough of these cute cat stamps!  Hee!  They just make me happy :)

Would you like to win Newton's Birthday Bash?  This set will be given away to Two lucky winners
Here's how to win: 
Comment on the NND blog and Design Team and Guest blogs (see list below)! Two winners will be chosen at random from the collective blogs February release posts. Make sure to check out each of their blogs and comment for your chance to win. You will not know which blog has been chosen so the more you comment on the better your chances are of winning! You have until Thursday, February 20th at 9 pm Central Standard Time to comment  -- winners will be announced on the blog post on Friday, February 21st.
Check out all these awesome Design Team Blogs below to enter:

Newton's Nook Designs
Taheerah Atchia
Christine Drogt
Samantha Mann
Larissa Heskett
Crafty Math-Chick
Danielle Pandeline
Valerie Ward
Tessa Wise (me)
Debbie Owens (Indy)  - Guest Designer
Chrissie Tobas - Guest Designer

Thanks again for joining me throughout the Newton's Nook Designs February release!  Such cute sets this time around- I hope you liked them as much as I did!

-tessa

Wednesday, February 19, 2014

Newton's Nook Designs February Release- Tweet Talk

Hello and welcome to day two of Newton's Nook Designs February release!  Today the team is showcasing the adorable Tweek Talk set:

Birdhouse Card 1

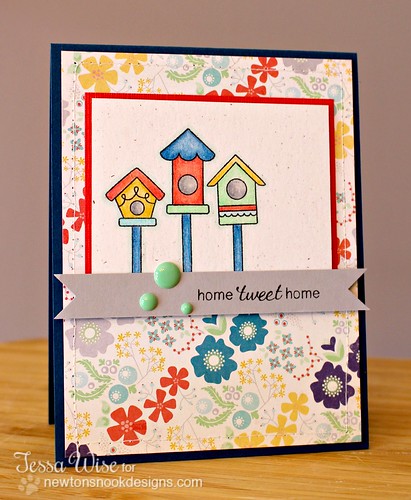
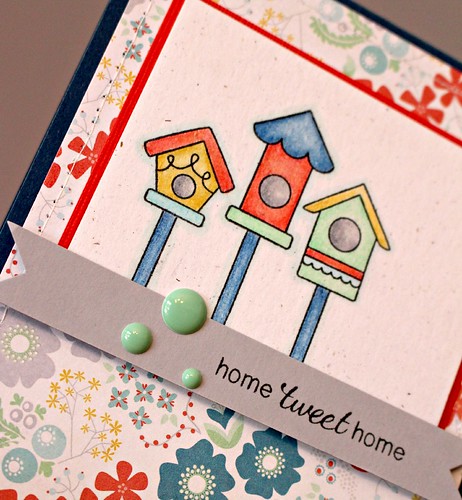
Tweet Talk is a great little set- It has birdhouses and birds and cute sentiments.  You are able to hang the birdhouses, set them on top of poles, or leave them plain.  I love all the options!

I started by stamping the three birdhouses from the Tweet Talk set in a row on a naturals white panel.  Next, I stamped the poles.  I colored them all using my Prismacolor pencils- the colors were taken from this fun patterned paper by My Mind's Eye.  When I was done, I matted it in red cardstock and added it to my card front.  I stamped the sentiment onto smokey gray cardstock and added some enamel dots to finish it off.

Birdhouse Card 2

I can't wait to use this again!  I have a few ideas in my head and I'm wishing I had added the birds in somewhere here!  lol!

Would you like to win Tweet Talk?  This set will be given away to Two lucky winners
Here's how to win: 
Comment on the NND blog and Design Team and Guest blogs (see list below)! Two winners will be chosen at random from the collective blogs February release posts. Make sure to check out each of their blogs and comment for your chance to win. You will not know which blog has been chosen so the more you comment on the better your chances are of winning! You have until Thursday, February 20th at 9 pm Central Standard Time to comment  -- winners will be announced on the blog post on Friday, February 21st.
Check out all these awesome Design Team Blogs below to enter:

Newton's Nook Designs
Taheerah Atchia
Christine Drogt
Samantha Mann
Larissa Heskett
Crafty Math-Chick
Danielle Pandeline
Valerie Ward
Tessa Wise (me)
Debbie Owens (Indy)  - Guest Designer
Chrissie Tobas - Guest Designer

I can't wait to pop through the list of designers to see what they all made!  I hope you have time to do the same!

I'll be back tomorrow with another card featuring Newton's Nook Designs February release!

-tessa

Tuesday, February 18, 2014

Newton's Nook Designs February Release- Winston's Birthday Set


It's time for a new release from Newton's Nook Designs!  This month's stamps are so fun!!  Today we are celebrating our newly named bear Winston- he's starring in his very own birthday set, Winston's Birthday!

Bear Party Card 1

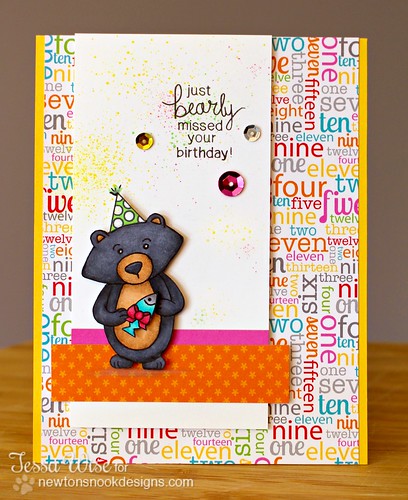
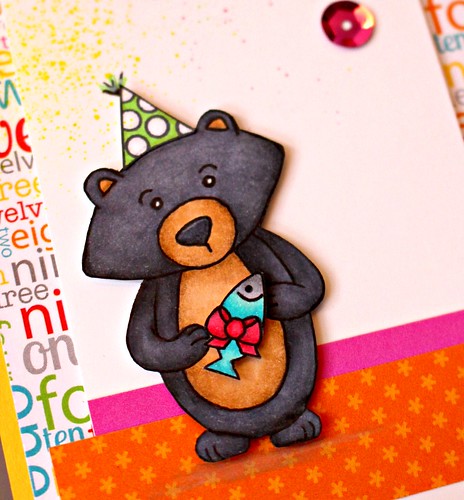
I love this fun set!  Winston comes with lots of accessories he can hold in his hands.  I loved the fish- it just makes me smile because of course, that's what a bear would want!  Hee!  I colored Winston with a mix of Copic markers and Prismacolor pencils.  I also colored a hat for him along with the fish.

The patterned papers are by Doodlebug Designs- the bright colors are perfect for a birthday, aren't they?  I cut a panel of white cardstock to add to my card front and added a couple of strips of the patterned papers to the bottom.  I added Winston next, using pop dots.  I also added his hat and fish.  I stamped the sentiment next and then spritzed different colors around him with my Stampin' Up! markers.  I added the sequins last to give it a little sparkle!

Bear Party Card 2

I really had fun with this set and I know you will too!

Would you like to win Winston's Birthday Set?  This set will be given away to Two lucky winners
Here's how to win: 
Comment on the NND blog and Design Team and Guest blogs (see list below)! Two winners will be chosen at random from the collective blogs February release posts. Make sure to check out each of their blogs and comment for your chance to win. You will not know which blog has been chosen so the more you comment on the better your chances are of winning! You have until Thursday, February 20th at 9 pm Central Standard Time to comment  -- winners will be announced on the blog post on Friday, February 21st.
Check out all these awesome Design Team Blogs below to enter:


Didn't the design team members do a great job with with this one?  I love looking through them all!  

Hope you have a great day!  See you back here again tomorrow for a peek at another new set from Newton's Nook Designs

-tessa

Thursday, February 13, 2014

Hooked On You Valentine Card

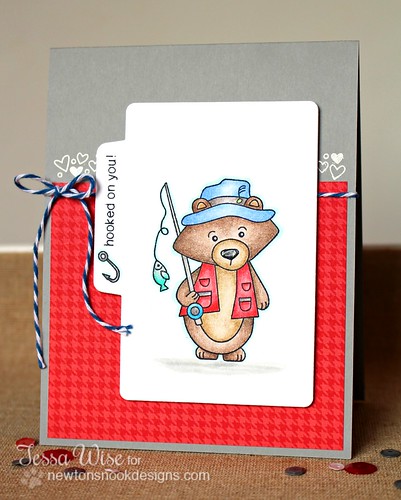
Hello!  I meant to blog earlier in the week but somehow the days got busier and busier as they went on.  I thought the week was going to be a slow one but boy was I wrong!  I ended up with a bunch of unexpected things to do.  Today we have a snow day so I finally have time to pop on and share a card I made for Newton's Nook Designs:

Fisher Bear Card

I thought this cute little guy would be a fun one for a masculine valentine, especially for someone who likes to fish :)  I colored him with my Prismacolor colored pencils- I love the texture they give!

I added the hearts from the Sweetheart Tails set along the top of my red patterned paper panel.  They've been embossed with white embossing powder.

So Newton's Nook Designs decided to give this little guy a name since he appears in quite a few of their stamp sets- pop over to their poll page to vote for your favorite!

Well, I better keep this short- I have a few Valentines to finish for tomorrow still!  Hope you have a great evening!

-tessa


Saturday, February 8, 2014

Brewing Up Birthday Wishes Card

Happy Saturday!  My day is super busy- I'm teaching two classes at my local scrapbook store, Scrapdoodles today!  I love teaching and todays classes will be so fun!!  After that, my girls are going to a sleepover birthday party which means date night for me and my hubby!  No complaints here! :)

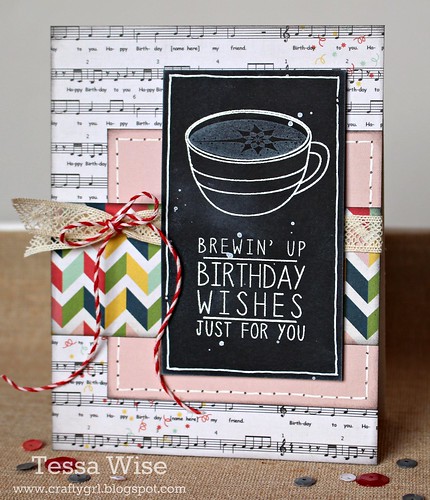
Before I got started on my day, I thought I'd share a card I made using the fun Be A Barista set by Reverse Confetti.  I used this month's Sketch For You To Try for it:

Coffee Chalkboard Card 1

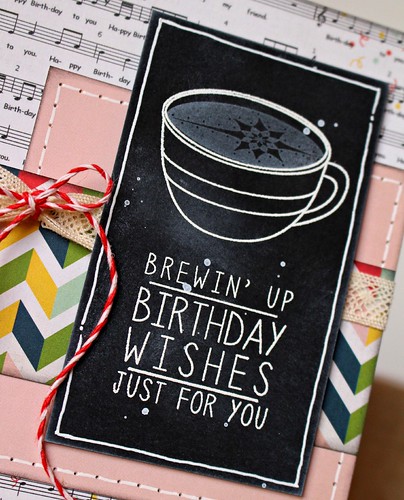
I created a mini chalkboard by stamping the coffee cup and sentiment on to a black cardstock panel with Versamark.  I heat embossed it using white powder and then doodled around the edge with a white gel pen.  I stamped the coffee with Whisper White ink and then used a sponge to ink around the edges and in a few random places on my panel.  I splattered it with white mist and let it dry.

The patterned papers are from the Carta Bella It's a Celebration collection- I used the 6x6 pad.  I cut out all my patterned papers and inked around the edges of each piece with a black cat eye ink pad.  Mine's dried out a little and perfect for this!  I did a little faux stitching around the pink panel, too:

Coffee Chalkboard Card 2

Wasn't the sketch cute this month?  I loved it!  I'm so glad I had a little time to play along yesterday.   

Well, I better get in gear and head down to class.  Hope you have a great weekend!!

-tessa

Friday, February 7, 2014

Daily Stories Cards

Well, I've been ignoring my blog all week!  I meant to come and share my cards for the Teresa Collins Designs blog on Wednesday.  I guess a little late is better than not at all, right? :)  I had so much fun making them!  Here they are:

My first card showcases some of the fun embellishments in the Daily Stories line along with some Basically Essential modeling paste:

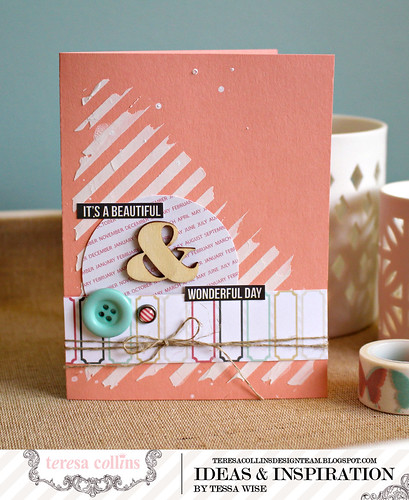
Beautiful Day Card 1

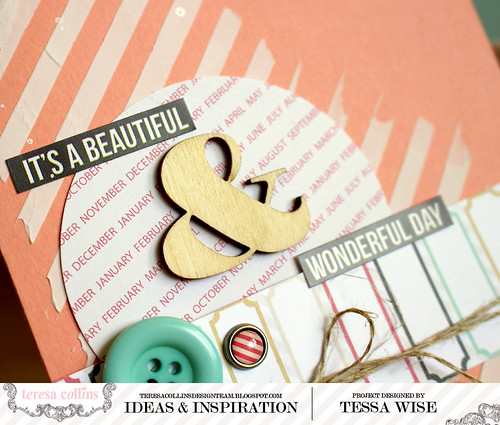
I started with a peachy card base and pulled out the diagonal striped stencil from the Basically Essential Stencil Pack #1.  I taped my stencil down over my card front and slathered on a thin coat of modeling paste with a pallet knife.  I added the pasted only to the space I wanted, careful not to cover the entire card.  Once I had it spread out, I lifted up the stencil revealing the striped design.  I let it dry completely before I went on.

Once it was dry, I picked some papers from the Daily Stories 6x6 pad.  I punched a circle out of the months print and cut a strip of the labels print as well.  I added the circle to my card first and layered the strip over it next.  I added the embellishments next- a decorative button, brad, and wood piece.  The stickers are from the 6x12 Word Sticker Sheet.  I finished off the look with a splatter of shimmer mist and a bit of linen thread wrapped around the card.

Beautiful Day Card 2

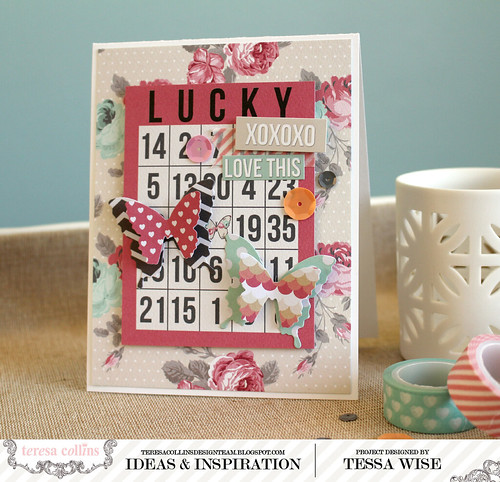
The second card was a quick one showcasing some of the patterned papers from the Daily Stories collection as well as those cute layered butterfly stickers:

Lucky Butterflies Card 2

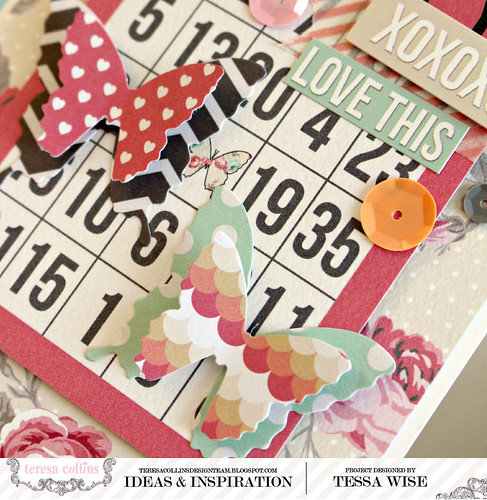
I created a card base out of white cardstock.  I layered a panel of the rose printed paper (Flowers) in the center next.  I cut the lucky bingo card out of one of the journaling card prints (Remember) and placed it in the center of my card using dimensional foam adhesive.  The butterfly stickers came next, as well as a bit of the striped decorative tape in the right corner.  I layered the sentiment stickers just over the tape and added a couple sequins to finish off the look.

Lucky Butterflies Card 4

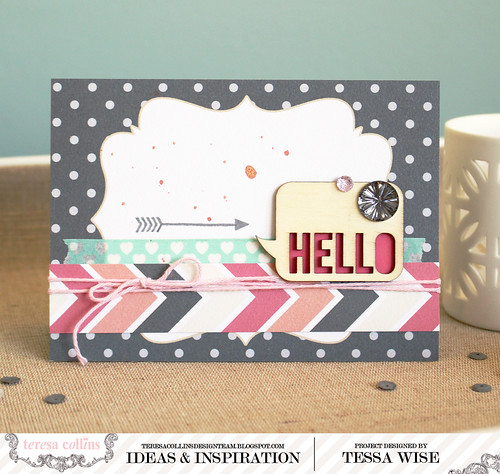
I have one more card to share with you today!  This one shows how great the 4x6 journaling cards look as card fronts:

Hello Card 1

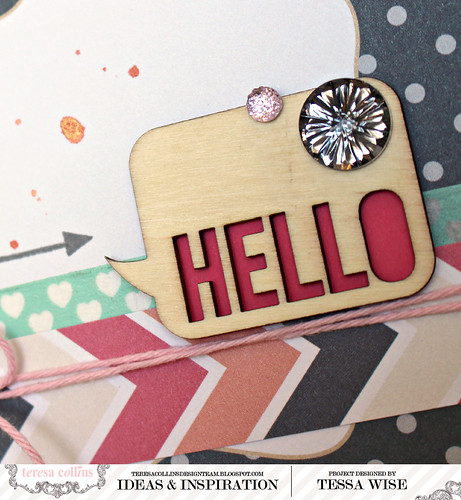
I created a card base out of gray paper and added the label journaling card (Remember) to the front as my card front.  I added a strip of the heart decorative tape along the bottom half of the card and then added a strip of the arrows pattern (Currently) just below that.  I wrapped some pink twine around it and tied it in a bow.  Next, I pulled out the Daily Stories clear stamps and stamped the arrow with gray ink.  At this point, I splattered the card with peachy shimmer mist.  I chose the hello word bubble wooden shape and covered the backside with pink cardstock.  I love the dimensions this gives!  I added it to the card and finished off the look with two of the beautiful gems.

Hello Card 2

The Daily Stories collection has so many cool bits and pieces!  It's such a fun collection to work with- you're going to love it!!  Thanks for joining me today!

-tessa

Sunday, February 2, 2014

Teresa Collins Latest and Greatest Videos

Hi!  Hope you are enjoying your weekend!  I have a minute before we're off to lunch and a super bowl party this afternoon (Go Seahawks!) so I thought I'd pop on and share a few videos Teresa Collins did for Scrapbook Expo.  Her projects are so cute!

Transparencies


Stencils and Modeling Paste


Flip Books


Albums Made Easy


I saw that Chantilly, VA is back on the list of locations for Scrapbook Expo this year!  It's always a fun show to go to- lots of goodies to buy and great classes!

I hear that Teresa's staff is busy packing up all the new lines to ship to retailers soon!  I can't wait to see what everyone does with it!!

Hope you have a great day!

-tessa