Today I want to share a couple of cards I created for the Teresa Collins Designs team blog this week. I just love how they turned out! Really, whenever I use my eBosser and TC embossing folders I love how my projects turned out! lol! For these cards, I paired the embossing with the new Urban Market collection that is available now.
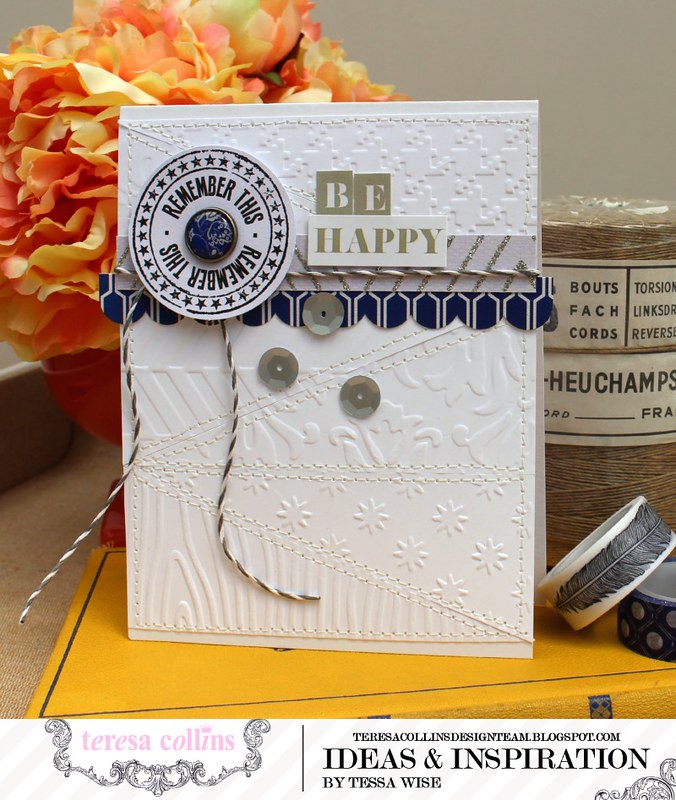
This first one was inspired by a triangle quilt I saw online. I loved the stitched pattern and and although it was done in colorful fabrics, I couldn't wait to try an all white, embossed version of it!
I started by cutting 6 4.25 x 1.75" strips of white cardstock. I ran each of them through the eBosser using a different embossing folder. Once they were embossed, I cut them in half diagonally to make 12 triangles.
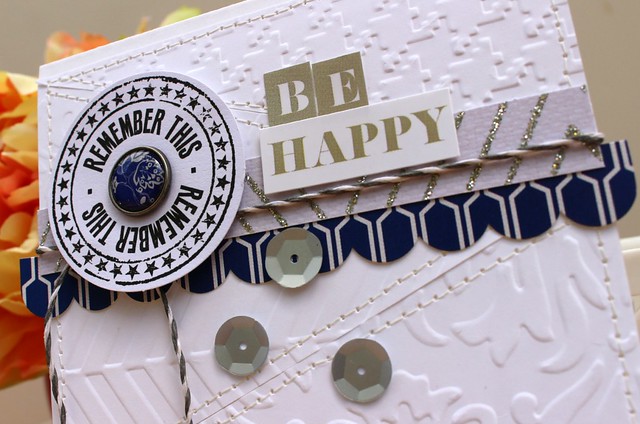
Starting at the bottom of the card, I adhered the triangles to a white card base using my Teresa Collins Mega Runner by Xyron. I was careful to keep the adhesive in the centers of each triangle so I could easily sew over each piece. Once they were all in place, I sewed around each triangle with my sewing machine to create the quilted look.
Once my embossed card base was finished, I added the embellishment cluster to the top of my card. I started with the blue tiled scallop sticker strip from the Urban Market sticker sheet. I added a strip of the glittered Zig patterned paper next and then tied a length of twine around the card. I found the Remember This die cut circle in the Urban Market ephemera pack and embellished it with a blue floral brad from the Urban Market designer brads. I added it to the card using dimensional foam adhesive. I created the sentiment from the Urban Market Alpha and Label sticker sheet. To finish off the look, I sprinkled a few sequins below the cluster.
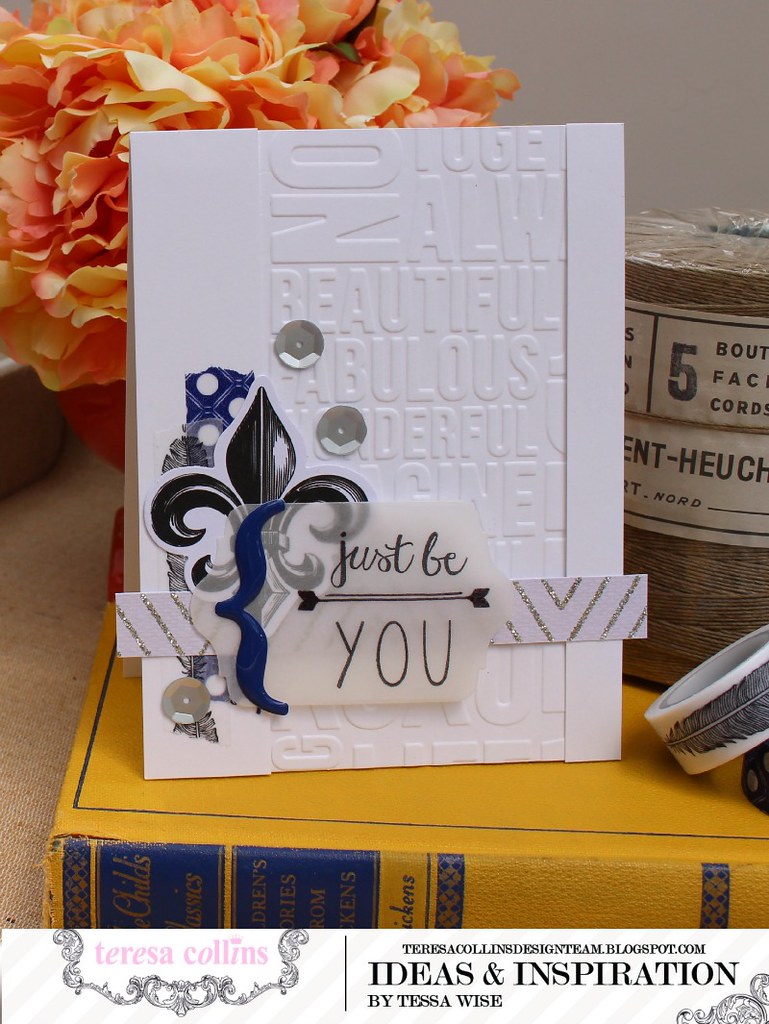
I have had this second idea in my head for awhile. I love the look of an embossed strip down the front of a card but wanted to modernize it a bit. This turned out exactly like I wanted it to:
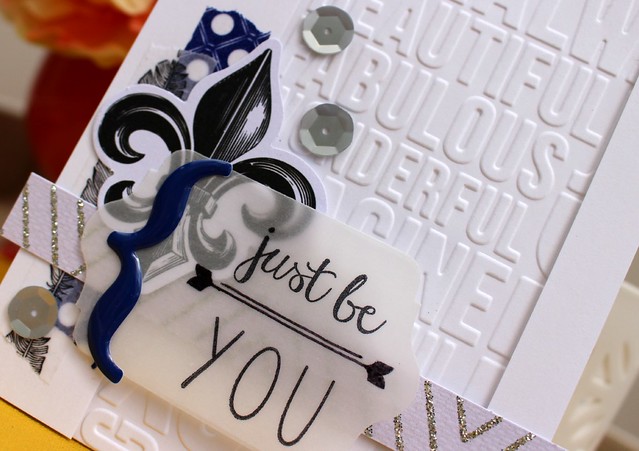
I cut a 5.5 x 2.75" panel of white cardstock and embossed it using the Beautiful Words embossing folder. Cutting out the panel before you emboss means you can place the panel over the words you want to capture when you emboss. I loved the list of beautiful, fabulous, and wonderful so I placed the panel over this area of the folder and ran it through my eBosser.
I created a card base out of white cardstock and adhered the embossed panel onto the card 1/2" from the right side. I then cut two strips of cardstock- one 5.5 x 1/2" and the other 5.5 x 1". I used thin foam adhesive to add them to either side of the embossed panel.
Next, I embellished the card with some of my favorite new products from the Urban Market collection. I used the feather and blue tile decorative tapes on the left side first. Then I added a strip of the glittery Zig patterned paper across the bottom. I added the fleur de lis from the Urban Market ephemera pack and pulled out my stamps. This sentiment is from the All About You set by Reverse Confetti. I stamped it onto a diecut vellum label with Staz On ink. I added the epoxy bracket sticker to the left so that I could hide my adhesive underneath it. I used the Teresa Collins Clear Hold Adhesive by Xyron to adhere the vellum to the card. Lastly, I added just a few pretty silver sequins to finish off the clustered look.
The embossing you get with the Teresa Collins eBosser folders by Craftwell is so crisp and perfect! It automatically gives anything you create a sense of elegance. It is always so fun making cards with them!
Thank you for stopping by my blog today!


These are so pretty! I love how you combined the embossed panels on the first, and the second is just so pretty, love the cluster of elements and the sentiment on vellum!
ReplyDelete