Showing posts with label hello card. Show all posts

Tuesday, July 7, 2015

A Simple Hello Card for Waffle Flower Crafts

 Hi!  It's day two of release week for Waffle Flower Crafts!  Today they are showcasing some beautiful new items, including this awesome alphabet die set!  Here is what I made with the new PaperCut Alphabet Die:


I kept it simple with this card so that the dies would really stand out.  Just a watercolored strip of cardstock popped up on a tan cardbase.  The dies are large and really stand out!


Don't forget to pop over to the Waffle Flower Blog to see what else is new and what the design team created with it all!
post signature

Monday, July 14, 2014

Pretty Doily Card for SRM Stickers

Good morning!  I hope you have a second to pop over to the SRM Stickers Blog today- I'm sharing a card featuring their new doilies!  Here is a peek at my card:


Pop over to the SRM Stickers Blog to see the rest!
post signature

Wednesday, March 19, 2014

Hello My Name Is Cards

Hello!  Today is my day on the Teresa Collins Designs blog!  I thought I'd share my cards here, too!  These ones use the Hello My Name is collection from Teresa Collins Designs.  I love so many things about this collection- cute typewriters, the bold color combination, the versatility... I could go on and on!  Here is what I created with it:

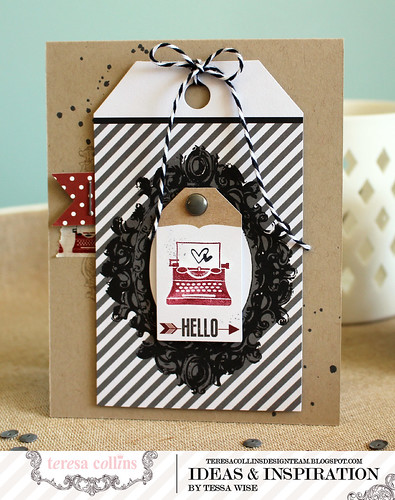
Typed Tag Card 

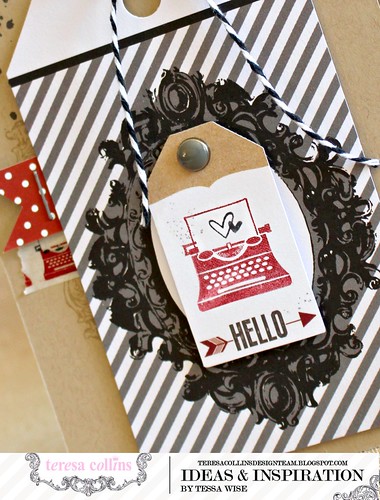
You can see one of my favorite elements of the collection on this card- the cute typewriters!  I used the stamp and also the decorative tape with typewriters on them- aren't they cute!!

I used the bold striped tag with a frame from the Hello My Name Is Ephemera Tags pack for my focal point atop a kraft card base.  I added the smaller tag from the Hello My Name Is Decorative Brads pack to the center of the frame after I stamped the typewriter on it.  

Typed Tag Card 2 

Just a little peek of the decorative tape, a bit of red patterned paper, and tone on tone stamping accent the focal point perfectly.

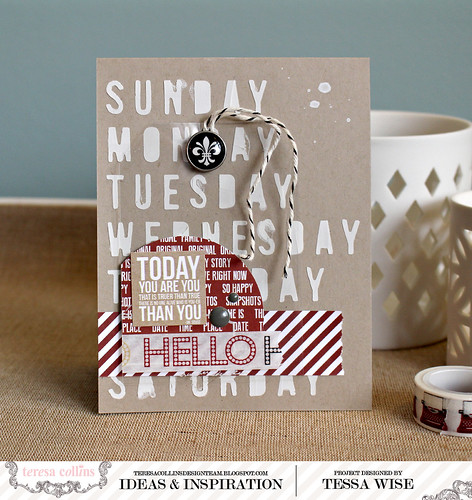
The next one uses the collection as more of an accent- I really wanted the stencilled background to be the focal point of this card:

Invisible Tag Card 2 

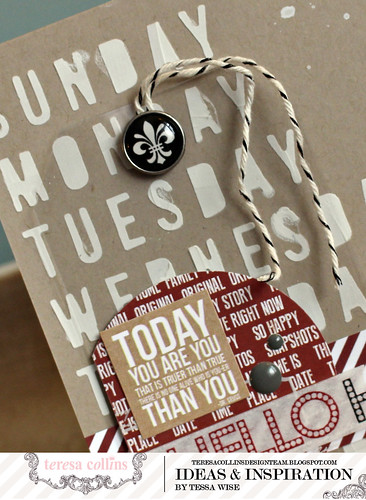
I started out with a kraft card base and used the Basically Essential modeling paste and stencil pack #2 to create the days of the week background.  I added a transparency is cut into a tag shape and embellished with patterned paper from the Hello My Name Is 6x6 pad, the hello decorative tape, and a sticker from the Decorative Sticker Sheet.  I accented the sticker with a couple of the Hello My Name Is epoxy dots as well.

Invisible Tag Card 4 

Adding the decorative brad and twine to the top of the tag lets you see the shape a little more.  In real life it's easier to see because it's shiny and reflects the light.

I have one more project to share today- a large tag.  This one was featured in this month's Scrapbook Generations online magazine, CREATE:

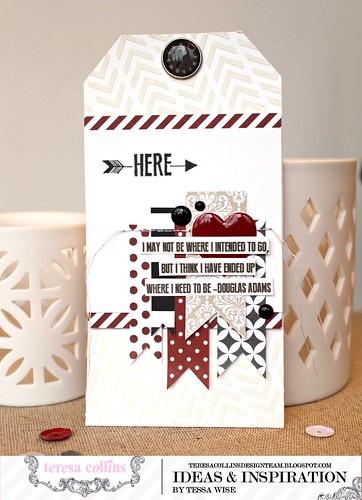
Here Tag 

I was inspired by a sketch sent by Scrapbook Generations.  I created a white tag base and added modeling paste over the chevron patterned stencil from Basically Essential Stencil Pack #2.  The tags are all created from paper out of the Hello My Name is 6x6 pad. 

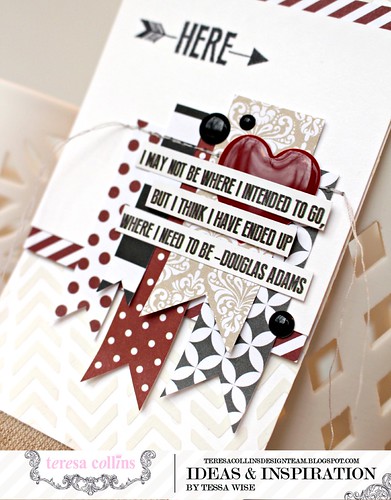
Here Tag 2

The quote is a sticker strip from the Hello My Name Is Decorative Sticker sheet that I  cut into smaller pieces.  I thought it worked well with the here stamp- isn't it great?

I really enjoy creating with the Hello My Name Is collection!  All the fun elements make card making so easy!  

Thanks for joining me today!

-tessa

Friday, February 7, 2014

Daily Stories Cards

Well, I've been ignoring my blog all week!  I meant to come and share my cards for the Teresa Collins Designs blog on Wednesday.  I guess a little late is better than not at all, right? :)  I had so much fun making them!  Here they are:

My first card showcases some of the fun embellishments in the Daily Stories line along with some Basically Essential modeling paste:

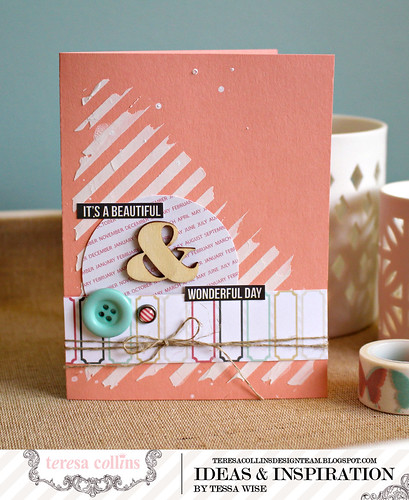
Beautiful Day Card 1

I started with a peachy card base and pulled out the diagonal striped stencil from the Basically Essential Stencil Pack #1.  I taped my stencil down over my card front and slathered on a thin coat of modeling paste with a pallet knife.  I added the pasted only to the space I wanted, careful not to cover the entire card.  Once I had it spread out, I lifted up the stencil revealing the striped design.  I let it dry completely before I went on.

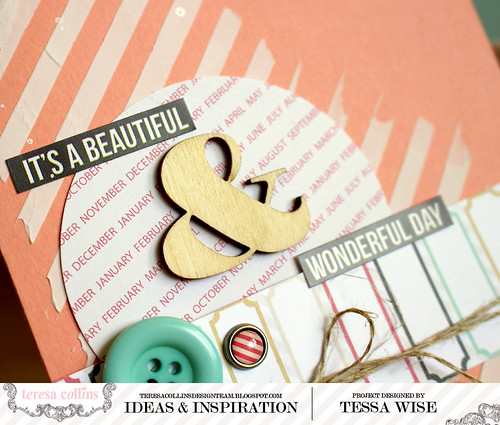
Once it was dry, I picked some papers from the Daily Stories 6x6 pad.  I punched a circle out of the months print and cut a strip of the labels print as well.  I added the circle to my card first and layered the strip over it next.  I added the embellishments next- a decorative button, brad, and wood piece.  The stickers are from the 6x12 Word Sticker Sheet.  I finished off the look with a splatter of shimmer mist and a bit of linen thread wrapped around the card.

Beautiful Day Card 2

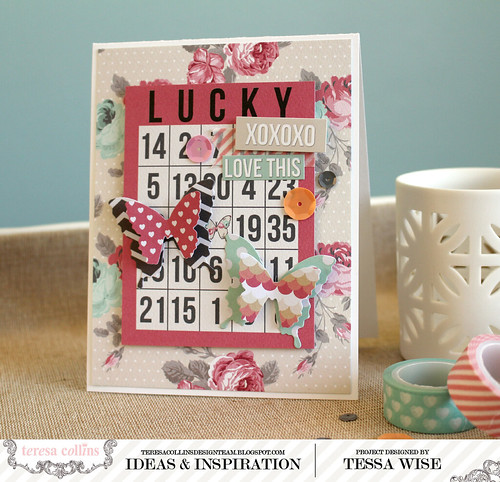
The second card was a quick one showcasing some of the patterned papers from the Daily Stories collection as well as those cute layered butterfly stickers:

Lucky Butterflies Card 2

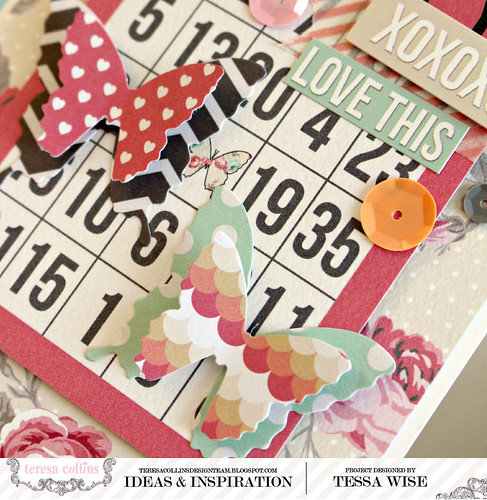
I created a card base out of white cardstock.  I layered a panel of the rose printed paper (Flowers) in the center next.  I cut the lucky bingo card out of one of the journaling card prints (Remember) and placed it in the center of my card using dimensional foam adhesive.  The butterfly stickers came next, as well as a bit of the striped decorative tape in the right corner.  I layered the sentiment stickers just over the tape and added a couple sequins to finish off the look.

Lucky Butterflies Card 4

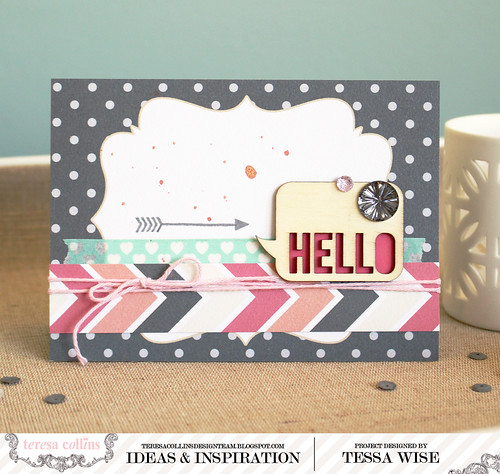
I have one more card to share with you today!  This one shows how great the 4x6 journaling cards look as card fronts:

Hello Card 1

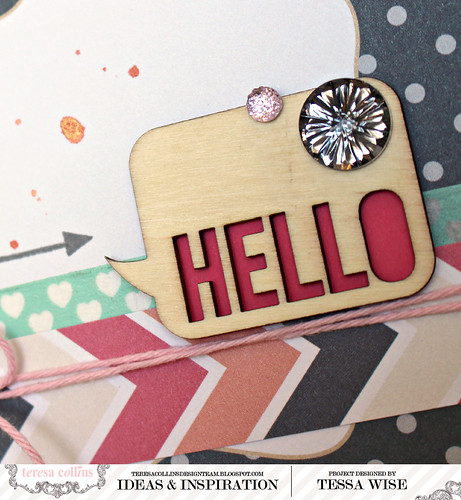
I created a card base out of gray paper and added the label journaling card (Remember) to the front as my card front.  I added a strip of the heart decorative tape along the bottom half of the card and then added a strip of the arrows pattern (Currently) just below that.  I wrapped some pink twine around it and tied it in a bow.  Next, I pulled out the Daily Stories clear stamps and stamped the arrow with gray ink.  At this point, I splattered the card with peachy shimmer mist.  I chose the hello word bubble wooden shape and covered the backside with pink cardstock.  I love the dimensions this gives!  I added it to the card and finished off the look with two of the beautiful gems.

Hello Card 2

The Daily Stories collection has so many cool bits and pieces!  It's such a fun collection to work with- you're going to love it!!  Thanks for joining me today!

-tessa

Wednesday, January 8, 2014

Hello My Name Is Cards

Hi!  I have some cards featuring the new Hello My Name is collection by Teresa Collins Designs to share today!!  I love all the new releases but this was the one I couldn't wait to unwrap.  The bold colors, the words, the typewriters!!  I love it all!  Once I started, I didn't want to stop creating with this collection and today I have three cards to share:

Typewriter Hi Card 2

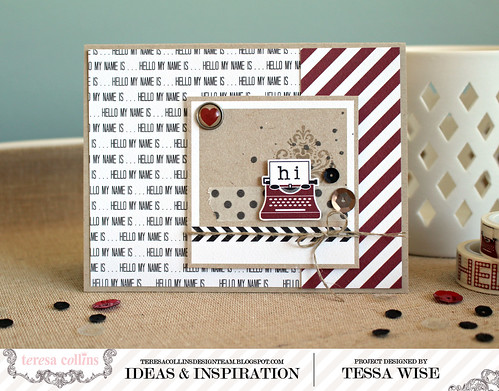
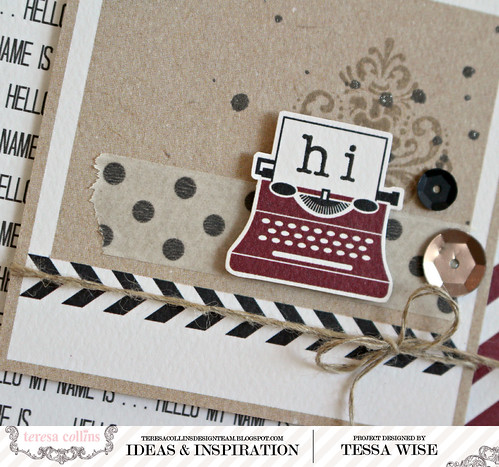
I used the 12x12 Hello My Name Is patterned papers for these cards.   The prints are great for cards- not too big!  I've added the names in parenthesis as I chat about them so you know where I found each piece.   The journaling cards also work well for cards- they make a great focal point.  I used one of the polaroid cards (Polaroids) for this one.  I stamped the damask image first with kraft colored ink and then splattered a bit of gray mist over it.  I added some of the polka-dotted washi tape next.  I cut out the typewriter (Noted) and stamped the 'hi' with some alphabet stamps I found in my stash.  I added it to the polaroid with a foam pop dot.  Lastly, I added some linen thread around it and finished off the look with a few sequins and a decorative brad.

Typewriter Hi Card 4

The typewriters are too cute!  I can't get enough of them and I'm SO glad they decided to include one in the stamp set!!  You'll see that in my next card:

Stamped Hello Card 1

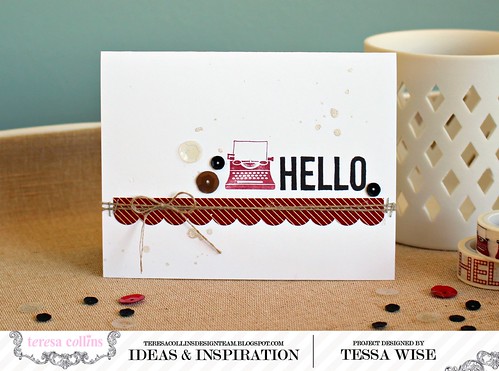
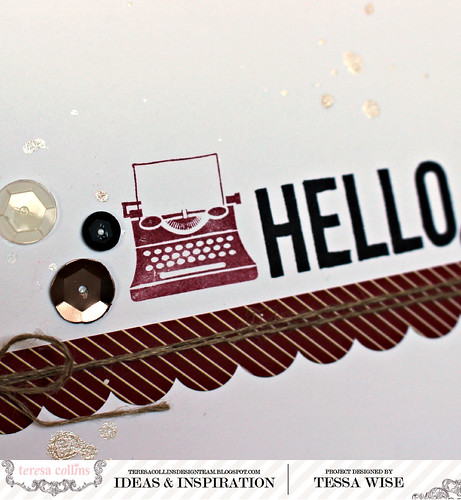
I wanted to create a clean looking card using the stamps so I started with a plain white card base.  I added the scalloped border sticker next.  To stamp the 'hello', I had to cut one of my stamps-  since it's clear, you can fit it back together on an acrylic block or use them separately.  You could just ink up the 'hello' part if you don't want to cut it, too!  Anyways, I stamped 'hello' with black ink next and then stamped the typewriter next to it in a dark red shade.  I decided to add a little sparkle to my simple card and splattered it with some pearly white mist.  I added some sequins to accent my stamping and then added the linen thread.

Stamped Hello Card 3

Isn't that typewriter stamp cute?  If you love typewriters like I do, you'll love this next one too- I used the adorable typewriter decorative tape on it!!

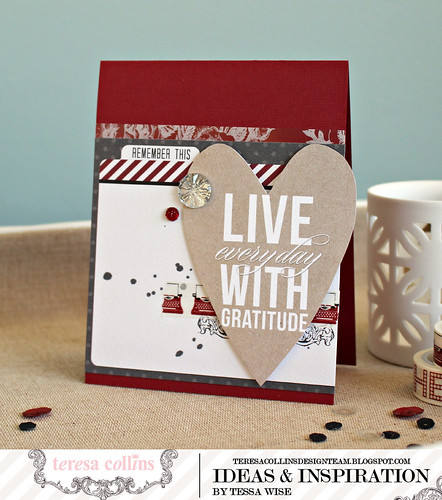
Live With Gratitude Card 3

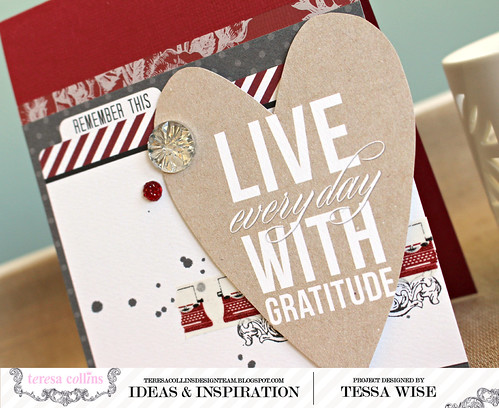
I used another journaling card (Love) as part of my background this time, cutting it to fit my card front.  I tucked a little strip of the floral photo overlay under the top portion.  I added the decorative tape next and then stamped the ornamental shell design in black just underneath.  I splattered a little gray mist next and then added my focal point.  I chose this journaling card (Record) and cut it into a heart shape.  I added it to my card front with foam pop dots and embellished it with two beautiful gems.

Live With Gratitude Card 2

It feels so good to start the year off with a few cards- one of my resolutions is to send at least one card each week of the year.  I'm so glad I could share them with you all!!

Thanks for joining me today!!

-tessa

Supplies Used:
Teresa Collins Designs: Hello My Name Is 12x12 papers,  Hello My Name Is Sequins, Hello My Name Is Gems, Hello My Name Is Decorative BradsHello My Name Is Clear Stamp SetHello My Name Is Photo OverlaysHello My Name Is Decorative Stickers

Other: Cardstock by Bazzill; Linen Thread by Stampin' Up!; Mists by Studio Calico; Red Ink- Cherry Cobbler by Stampin' Up!; Black Ink- Versafine Onyx Black by Tsukineko; Kraft Ink- Crumb Cake by Stampin' Up!

Tuesday, November 19, 2013

Some Memorabilia Projects for Teresa Collins Designs

Hi!  It's my day to post on the Teresa Collins Design Team Blog and I thought I'd share my projects here, too!  Cards are my favorite thing to create so of course, that's what I started with this week when I had some time to craft.  I pulled out the Memorabilia collection and got to work! :)  First I made a collage style hello card:


Collage style cards are my favorite!  I love adding the layers and textures one at a time, building up into the look I'm going for.  With this card, I started with a pale blue card base.  Next, I cut a panel of the Document patterned paper and splattered it with mint colored mist.  Once it was dry, I stamped the hot air balloon from the Memorabilia stamp set.  Then I added my doily, folded in half and layered some Memorabilia washi tape over the seam.  I wanted to add some banners next- I chose two, one from the Memorabilia sticker sheet and one from the chipboard elements.  I added the twine next, tying it in a bow.  My last layer was the cute sentiment from the Memorabilia sticker sheet.  I added it to the card front with dimensional adhesive and embellished it with a couple of epoxy dots.  I finished by adding the panel to my card base with dimensional foam adhesive.


Aren't the layers fun?  :)  After I finished my collage style card, I wanted to do something simple.  The banners on the Recorded patterned paper inspired this one:


I cut a panel out of the Recorded patterned paper out so that the banners would run along the top of my card.  I stamped the sentiment (Lots to Say set by Reverse Confetti) in the lower right hand corner using Versamark ink and then embossed it with white embossing powder.  I flicked the panel with white mist and let it dry.  Once it was dry, I lightly sponged white ink around the edges of the card front.  Lastly, I embellished with the Memorabilia epoxy dots.


It's an easy to make card with a big impact I think!

After two cards, I was ready to create something a little different.  I grabbed a clear pillow box from SRM Stickers to decorate- it's the perfect size for a gift card or a small treat:


I started this project with some found items.  I tore a page out of an old book and wrapped it around the center of the pillow box.  Next, I wrapped it with some dark gray yarn.  I cut a heart out of the Quatrefoil patterned paper and added it to the center using dimensional adhesive.  The sentiment banner came next- it's from the Memorabilia die-cut sheet.  Lastly, I embellished it with some of the pretty Memorabilia sequins.  I just love them!


I really enjoyed creating these projects!  The smaller canvas of cards and goodie boxes is perfect- not too much space to fill and so fun to give away!

Thanks for joining me today!

Supplies Used:
Teresa Collins Designs: Memorabilia 12x12 papers, Memorabilia Sticker Accessory Sheet, Memorabilia Sequins, Memorabilia Chipboard Elements, Memorabilia Epoxy Dots, Memorabilia Decorative Tape, Memorabilia Die-cut Sheet
Other: Cardstock by Stampin' Up!; Twine by The Twinery; Sentiment stamp by Reverse Confetti; Clear pillow box by SRM Stickers; Doily by Stampin' Up!; Mists by Studio Calico and Dylusions

Tuesday, October 8, 2013

You Are My Happy Cards

Hello!  Today I'm sharing a few cards on the Teresa Collins Designs team blog.  I thought I'd add them here, too!  They feature the new You Are My Happy collection:

The first one features some of the great ephemera pieces from the You Are My Happy Ephemera Pack:


The tag with the little heart cut out of it was my favorite piece from the ephemera pack.  It's simple but so perfect for a card!  I popped it up and added the square of striped paper that came in the ephemera pack to the back.  The 2 is also from the pack- you get 0-9 and can use these in so many ways!


Can you see the shine on those little hearts behind the sentiment?  They are the prettiest shade of rose gold- something you'll see on quite a few pieces in the You Are My Happy collection.  It is such an awesome detail!  The letter stickers and 'us' sticker are from the You Are My Happy Sticker Accessory Sheet and the Best Friends banner is from the You Are My Happy Chipboard Elements package.  I had fun with the layers on this one!

My next card is a clean and simple card using a cut out from the Hello Tags patterned paper:


I knew exactly what I wanted to do with this hello cut out.  I simply popped it up on my coral cardbase and added a strip of patterned paper (Shooting Arrows) along the bottom edge.  I embellished it simply using a few of the pretty sequins from the You Are My Happy collection.

For my next card, I started with the medium file folder as my base- I love the floral polaroid on it:


I splattered a bit of shimmery mist in the center and added the polka-dot hexagon sticker from the You Are My Happy Sticker Accessory Sheet.  I added the rose gold border strip next and then the chipboard heart from You Are My Happy Chipboard Elements.  I added my sentiment stamp next to my cluster and then added the banners and brad to the top left corner.  These banner flags can be found in the You Are My Happy Ephemera Pack and the brad is from the You Are My Happy Decorative Brads. Lastly, I added a few sequins around the heart and on the file folder tab.  They are such a pretty element- I love how they add a little sparkle!


I love how this next one turned out!  Do you recognize the embossing?  It's from one of Teresa's new 8 1/2 x 11" embossing folders from her Ebosser line:


Isn't the embossing pretty?  I love it!  After embossing my card front, I picked out the heart tag from the You Are My Happy Ephemera Pack and added it to the right side.  Next, I added the two borders along the bottom.  I stuck the pink chipboard piece next and then splattered my shimmery mist over the card.  To finish off the look, I added a few sequins and the sentiment which is a sticker from the You Are My Happy Sticker Accessory Sheet.  I popped up the sentiment sticker and added some twine to give some dimension to my card.


I was so inspired by the new You Are My Happy collection!  The colors and patterns are so me right now- I have more cards and even a scrapbook page or two planned in my head!  I can't wait to find some more time to spend creating!  I know you'll love it too!

-tessa

Supplies Used:
Teresa Collins Designs: You Are My Happy Designer Papers, You Are My Happy Sticker Accessory Sheet, You Are My Happy Sequins, You Are My Happy Die-cut Borders, You Are My Happy Decorative Brads, You Are My Happy Ephemera Pack, You Are My Happy Chipboard Elements, You Are My Happy File Folders, Beautiful Brocade embossing folder, Teresa Collins Ebosser
Other: Cardstock by Stampin' Up!; Twine by The Twinery; Sentiment stamps by Stampin' Up!, mist by Studio Calico

Tuesday, September 10, 2013

Hello Dahlia Cards

Hi!  I found some time over the weekend to create a couple of cards and thought I'd share them with you today!  I used my new Stampin' Up! goodies I picked out from the new catalog- the new Regarding Dahlia was my first pick!  Here are the cards I made:


Since the dahlia stamp is so detailed and beautiful on its own, I decided to keep my cards clean and simple.  I started out with a piece of watercolor paper and watercolored a square using my Crushed Curry ink pad.  Isn't it such a pretty yellow!  I waited for it to dry completely and then with the help of my embossing buddy, embossed the dahlia and sentiment using white embossing powder.  It looks really pretty against the yellow!


I created a card base of Sahara Sand cardstock.  For contrast, I added a bit of Midnight Muse cardstock with some faux stitching on it along with the watercolored panel to my card front.  I embellished it with one of those fun wooden buttons and some linen thread.

For my next card, I started with another Sahara Sand cardbase:

I stamped the dahlia in Midnight Muse ink towards the bottom left corner.  I added a strip of Crushed Curry cardstock and a small bit of Midnight Muse cardstock along the bottom using dimensionals.  I wrapped it with some linen thread and finished it off with another wooden button.


I splattered just a little SC Calico Shine mist over it and then added my sentiment banner just under the button.  The banner is from the gift box kit from the SU! spring mini and the sentiment comes from the You're My Type set.

I'm so happy with how these cards turned out!  I'll be grabbing these colors again, too!  In fact, I had to put in another order to get more of this pretty yellow paper! :)

Thanks for stopping by today!

-tessa

Wednesday, July 17, 2013

Newton's Nook Designs Launch Party: Winged Wishes


Welcome to day 3 of Newton's Nook Designs Launch Party!!


Today's release is Winged Wishes and what a great set it is!  It features two cute birds that hold the sentiments and other images between them.  It's a really fun concept and I loved creating with this set!


I started by stamping my sentiments and bird onto white cardstock and punching out a large circle around it.  I stamped the birds again onto light blue patterned paper and fussy cut them out.  I pieced one over the bird on the circle.  Next, I created a blue cardbase and decorated the bottom with the fun patterns from the Pebbles Inc. Family Ties line.  I added the twine and the circle using foam adhesive dots.  I stamped the bird one more time onto the card front and added the second patterned bird over it.

There are so many things you could do with this set!  Newton's Nook Designs will be giving it away this week- here are the details:

Would you like to win Winged Wishes? This set will be given away to Two lucky winners!

Here's how to win:

1. Comment on Newton's Nook Design blog: http://www.newtonsnookblog.com. One Winner will be randomly chosen from the comments on the launch party post.

2. Comment on the Design Team Member and Guest blogs (see list below)! One winner will be chosen at random from the collective blogs in the Launch Party. Make sure to check out each of their blogs and comment for your chance to win. You will not know which blog has been chosen so the more you comment on the better your chances are of winning! You have until Thursday, July 18th at 9pm Central Standard Time to comment  -- winners will be announced on the blog post on Friday, July 19th.

But wait… there's more. We will also be giving away a gift card on Facebook this week to celebrate our launch - so be sure to pop over there to like our page and enter to win! https://www.facebook.com/newtonsnook

Make sure you check out all the blogs participating in the Launch Party below to enter:


Chari Moss

All of the party participants cards are so fun!  I hope you get a chance to check all of them out- and remember, the more you comment the more chances you have to win this fun set!!

-tessa

Friday, July 5, 2013

A Set of Summer Stories Cards

Hello!  I have had so much fun making cards lately!  Today I'm sharing a set of cards on the Teresa Collins Designs Blog- I thought I'd share them here, too!  This set, using the beautiful Summer Stories line, came together quickly and I can't wait to send them out to my loved ones!  Take a look:


I started this one by decorating the simple journal card with a banner at the top.  I added some patterned paper, decorative tape, and  border.  Then I added the sentiment with stickers and embellished with some pretty pink epoxy dots and twine.


I matted it in black and added it to my chevron patterned card base.  Those pink dots look like candy, don't they?
Here is my next one:


I used another journaling card as my focal point- maybe that's why these cards were so quick! :)  I stamped the camera in pink and then splattered some gold mist over it.  When it was dry, I added the chipboard and die-cut banners with a pretty brad to the top.  I added the sentiment and twine to finish it off.  Last, I matted it on my card base.


I've gotten so much use out of these letter stickers!  Such a basic staple- I think I could use them on everything!
My next card also has some stamping on it:


I created my cardbase and covered the front with the pretty woodgrain patterned paper.  I added a tag to the bottom and layered some of the Summer Stories stickers on the left.  I added the decorative brads next and then the chipboard ticket.  I stamped the flower with gold ink and let it dry.  When it was done, I added my sentiment, a twine bow, and a little splatter of gold mist.


I love the clustered look I ended up with!
Here is my last card:


For this one, I started with my cardbase covered in the collage patterned paper.  I added the banners and tag to the top.  Next, I added my sentiment to the ticket and punched holes in both sides.  I attached it to the card and tied the twine around it, ending in a bow.


I'm so happy with how these cards turned out!  The glitter and gold adds a little drama while the color scheme feels light and airy.  It is perfect for this time of year!  :)


Supplies Used:


Teresa Collins Designs:
Summer Stories 6x6 Designer Pad, Summer Stories Epoxy Dots, Summer Stories Decorative Brads, Summer Stories Die Cut Accessories, Summer Stories Chipboard Elements, Summer Stories Decorative Tape, Summer Stories Stamp set, Summer Stories Die-cut Borders, Summer Stories Decorative Buttons, Summer Stories Sticker Accessory Sheet, Summer Stories Cards paper, Summer Stories Dots paper
Other:
Ink, cardstock by Stampin' Up!; Mists by Pink Paislee, Twine by the Twinery, ink by Tsukineko

Thanks for visiting today!

-tessa
 
site design by designer blogs