Showing posts with label heat embossing. Show all posts

Wednesday, July 20, 2016

A Sketchy Birthday Card

Hello!

Happy Wednesday!  I though I'd pop on early this morning and share a card I made for this week's Watch It Wednesday series for Waffle Flower Crafts!  You'll have to pop over to the Waffle Flower Blog to check out the video but here is a look at the card I made:


I went for a fun, layered look with this one!  I used the Sketchy Numbers Stamp Set along with the Lacy Layers Die to create my card along with some fun new embellishments from my stash.

I created a layered background that peeks through the vellum and heat embossed the focal image with white embossing powder.


Hope you enjoy the video!  I am hoping to get a few cards made this afternoon :)  There are only a few errands on my list today- including a trip to the craft store!  Fun Fun Fun!

Thanks for stopping by!

-tessa

Monday, October 19, 2015

Waffle Flower's October Challenge

Good morning!  We woke up to cold weather this morning- frost on the ground and everything!  I am not ready for winter...

Let's think fall instead! :)  Here is the card I made for Waffle Flower's October Challenge:


I loved the inspiration this month!  I embossed the stamped images from the Doily Square Stamp Set with gold embossing powder and cut around the outsides to make it stand out.  The sentiment and leaf is from the Holiday Labels- Give Thanks Stamp Set.  I added some embossing on the card base as well with a chevron embossing folder.

Pop over to the latest challenge post to see what this week's featured designers created!  The inspiration photos are on the blog as well!  I hope you'll play along with us!!

Thanks for stopping by today!

post signature

Monday, December 8, 2014

A Card for Craft Hoarders Anonymous

I'm playing along with the Craft Hoarders Anonymous Challenge today as one of their guest designers :)  If you haven't played along with one of their challenges yet you should check them out!  Any project is welcome- as long as you're busting some of that stash lol!

I pulled out some of my old favorites along with a few new pieces for this card.  It also features a gift card on the front- I do these every year for the teachers and the gift cards are getting cuter and cuter!  I love how they look on the front of cards :)


I started with a white card base and added the striped paper to the left hand side.  I added the scallop diecut edge to it next, cutting it the same length as the patterned paper.  The Starbucks gift card was next, taking main stage lol!  I added the sparkly snowflake next and then got to work on my sentiment layers.

I watercolored a piece of watercolor paper with various greens to mimic the green on the gift card.  When it was dry, I diecut it using the Holiday Fill In The Blank die set by Avery Elle.  I stamped the rest of the sentiment from the coordinating Holiday Fill In The Blank stamp set with Versamark onto vellum and embossed it with white powder.  Then, I diecut it using a long label die.


I layered the sentiments on to my card and added a bit of twine to finish it off.  I love the eclectic look I ended up with!  I can't wait to give this one to one of the girls' teachers :)

I had so much fun playing along with Craft Hoarders Anonymous this month!  Be sure to pop over to their blog to see what the rest of the team created!

post signature

Monday, November 10, 2014

Newton's Nook Designs November Release: Winter Tails

 Good morning!  I'm excited to be joining in with Newton's Nook Designs for their November release today!  They have some cool winter sets out this month- so fun!  Today's set is all about the SNOW!!  Winter Tails has cute little critters up to their ears with snow!  Here is what I was inspired to make with it:


The winter after we moved to Woodbridge was pretty cold and brought the most snow we had ever seen outside of the mountains!  We were excited about it all-- except for the shoveling!  lol!  I knew the stamps in the Winter Tails set would be a perfect compliment to the photos from this event!


I stamped the cute critters out on white cardstock and then used the snowy border stamp to make their snow drifts longer.  I colored them lightly with Copic markers and added some glitter with my Wink of Stella pen as well.  I fussy cut around the top of each animal, leaving the snow drifts below solid.

I created a long snowbank along the bottom as well by stamping the border stamp over and over.  I added the sign, sentiment, and snowman parts as well- aren't they fun!!

The title was made with stickers but I stamped the tiny snowflakes from the set around it with Versamark and heat embossed them with white powder.  I also used one of my favorite winter time products, Chunky White Embossing Enamel by Stampendous! to create the snow :)


It's not often that I have time to scrapbook these days but I still love it!   The papers are by Doodlebug Designs.  The stickers are by Echo Park, Bella Blvd, and American Crafts.

Would you like to win “Winter Tails”?
This set will be given away to TWO lucky winners
Here's how to win: 
Comment on the NND blog and Design Team and Guest blogs (see list below)! Two winners will be chosen at random from the collective blogs release posts. Make sure to check out each of their blogs and comment for your chance to win. You will not know which blog has been chosen so the more you comment on the better your chances are of winning! You have until Tuesday, November 12th at 9pm CDT to comment  -- winners will be announced on the blog post on Wednesday, November 12th
Check out all the awesome Design Team Blogs below to enter:

Donna Mikasa (Guest Designer)

Have fun hopping through the design team blogs today!  They made such cute things with this set!!  Don't forget to leave a comment for your chance to win! :)

post signature

Wednesday, October 29, 2014

Another Card Inspired by Project Runway :)

So last week was the finale of this season of Project Runway!  I loved it!  The outcome was what I was hoping for too- I loved the collection that won!  The concept, the colors, the fringe!!  So cool!

I was inspired to create a couple of cards based on the winning collection but my attempt of stamping fringe did not work out the way I had hoped lol!  Here is one that did turn out though:


I cut a panel of watercolor paper to 4x 5.5".  I watercolored it with black paint, fading the color as I painted up.  I let it dry and then cut the notches at the top with a small hole punch.  I wrapped some orange twine around the top and ended where I wanted the tassel to hang.  I was envisioning this as the back of one of the dresses in the winning collection- wouldn't that be pretty along the shoulder blades?

I created a tassel out of the same twine and adhered it to the card.  I stamped the sentiment with Versamark and embossed it with liquid platinum embossing powder.  It's acting as my jewelry along with the star sequins that matched the powder perfectly!  Hee Hee!


I loved Amanda this season and was a little sad that she lost but I didn't like her final collection as much as I thought I would...  Maybe because it seemed like a toned down version of her.  I'm tacky and loved the crazy quilting and stuff she did!  :)  Are you going to watch the All Star season that's starting this week?  You know I am!  I haven't peeked at who's coming back but I'm hoping some of my old favorites will be on again- it's fun to see what they're up to now, isn't it?

Thanks for stopping by today!
post signature

Tuesday, July 15, 2014

Newton's Nook Designs July Release- Beach Party!

Hi!  Welcome to day two of Newton's Nook Designs July release!  They are debuting another adorable stamp set- Beach Party!!  I love this set soooo much!!  Here is what I made:


I seriously can't stop smiling when I see this cute hula bunny!  She was so fun to color.  You should see the rest of the set- there's a Winston image in it too!!
I colored the hula bunny, surf board, and flowers with Copic markers and cut out around them.  I created a white card base and then cut a piece of watercolor paper to fit in the center.  I stamped the waves border with Versamark and heat embossed it with white powder over the watercolor paper.  Then I watercolored over it using Pool Party and Soft Sky residual ink.
Once the watercoloring was dry, I added the panel to my card front and then added the rest of the images.  I stamped the sentiment on a vellum label and added that as well.


Seriously cute!!  I just love this set!

Would you like to win “Beach Party”?
This set will be given away to TWO lucky winners! 
Here's how to win: 
Comment on the NND blog and Design Team and Guest blogs (see list below)! Two winners will be chosen at random from the collective blogs release posts. Make sure to check out each of their blogs and comment for your chance to win. You will not know which blog has been chosen so the more you comment on the better your chances are of winning! You have until Thursday, July 17th at 9pm CDT to comment  -- winners will be announced on the blog post on Friday, July 18th.  
We will also be having a giveaway on Facebook - so make sure to like our Facebook page and enter to win there! 
Check out all the awesome Design Team Blogs below to enter:

Tessa Wise (you're here)


Thanks for stopping by today!  See you tomorrow for another great release from Newton's Nook Designs!

Waffle Flower Challenge- Hello Friend Card

Hi!  Hope you're having a good day!  I have a new card to share inspired by the current Waffle Flower Challenge.  This time I chose to play along with the technique challenge:


Here is the card I made:


I made a pattern in banner form using the Flower Circle set.  I started with a light blue card base and stamped the different sized circles with various shades of turquoise and blue.  I added white in there, too- heat embossing the smaller circle image.
Once my circles were all stamped, I used my machine to sew a banner string in there to connect all the circles.  I added the epoxy dots next to add a little dimension.
The sentiment has also been heat embossed using white embossing powder.


This was such a fun card to make!  I love how the stitching really ties it all together.  I also love how the white embossing turned out.  

I hope you have a chance to play along with the Waffle Flower Challenge this month!  Cute Waffle Flower stamps and dies are up for grabs if you do!!  Pop over to the Waffle Flower blog to check it out and to see what the rest of the design team created!
post signature

Friday, April 25, 2014

Roses for the Inky Paws Challenge!


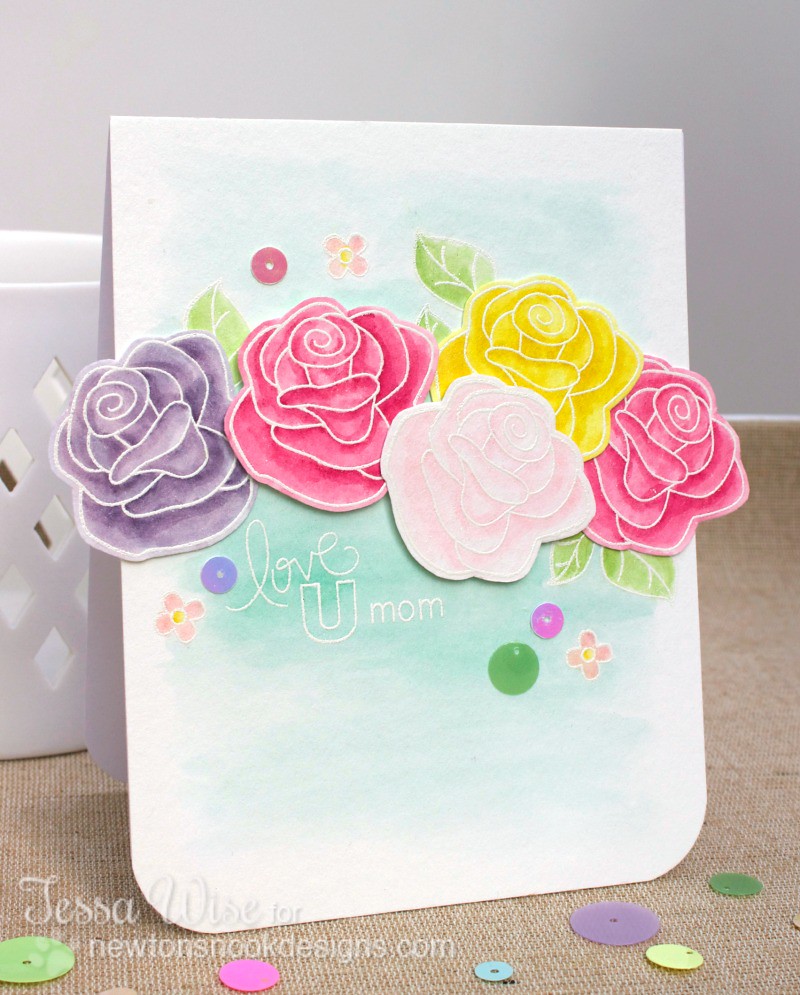
Good morning!  I'm popping in to share my card for this month's Inky Paws Challenge hosted by Newton's Nook Designs!  The are inspiring us with a pretty pastel color challenge this time around- I loved it!  Here is what I made:

NEWTON'S NOOK DESIGNS Roses For Mom Card

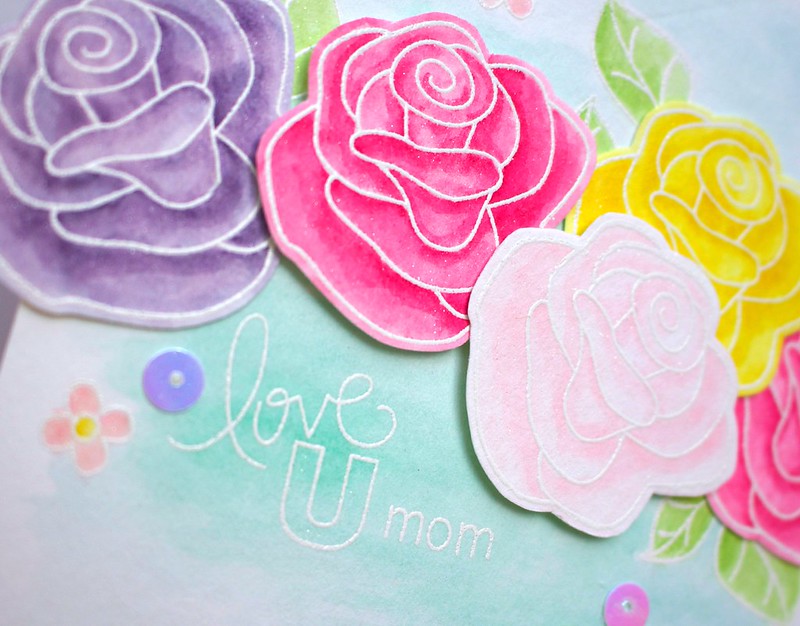
I used the new Love Grows set again- I can't get enough of these roses!  I stamped a bunch of them onto watercolor paper and embossed them using white powder.  Then I watercolored them using my Stampin' Up! markers.  I fussy cut around them once they were dry.
I built a card base out of white paper and cut a panel of watercolor paper to fit over the front.  I stamped a few leaves, the sentiment, and some of those cute little flowers onto the card front and again embossed them with white powder.  I watercolored them and then added the blue to the background.  It's so soft and pretty in real life!  I love it
I added the roses next, letting them hang off the edges of the card.  I used foam adhesive dots to pop up some of them, too!  To finish off the look, I added a few sparkly sequins.

NEWTON'S NOOK DESIGNS Roses For Mom Card 2

I had so much fun playing along with the Inky Paws Challenge this month!  Pop over to the Newton's Nook Designs blog to see what the rest of the team members created and to play along!  As always, they are giving away a gift card to the Newton's Nook Designs store to a lucky winner so give it a go! :)
post signature

Tuesday, April 15, 2014

Newton's Nook Designs April Release- Love Grows

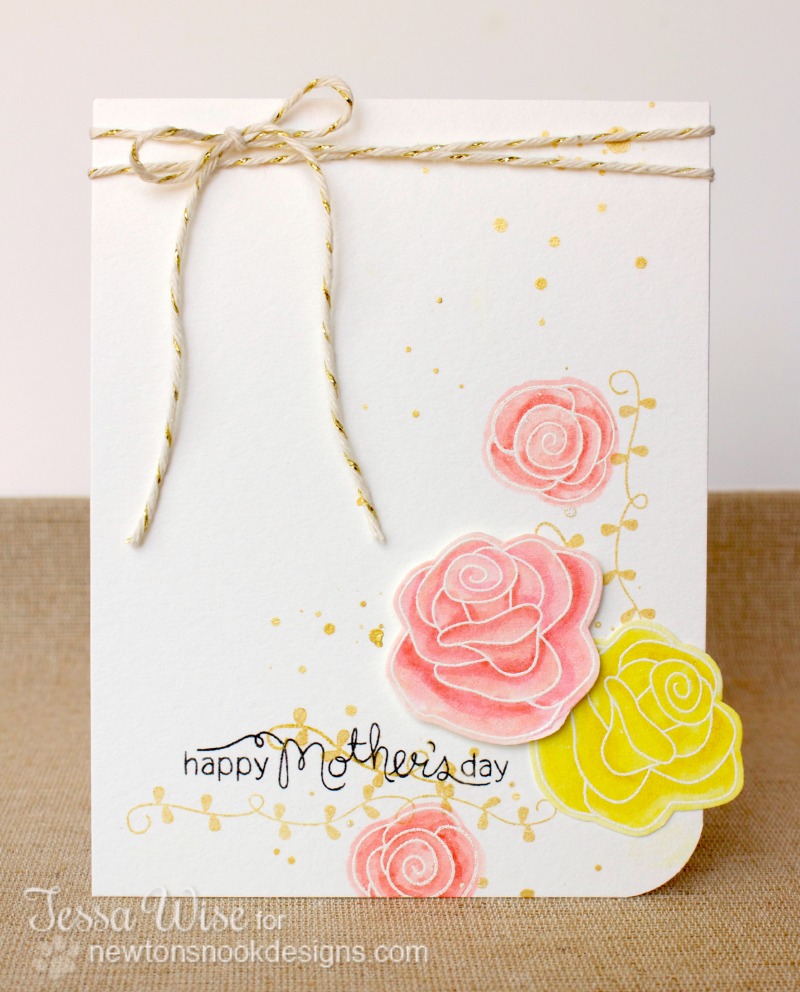
Hi!  It's time for another Newton's Nook Designs release!  This one is super cute- I love the sets this month!  Today we are showcasing the Love Grows set- it's a mini set full of beautiful roses and pretty Mother's Day sentiments.  Here is what I made:

Newton's Nook Designs Mother's Day Card 1- Tessa Wise

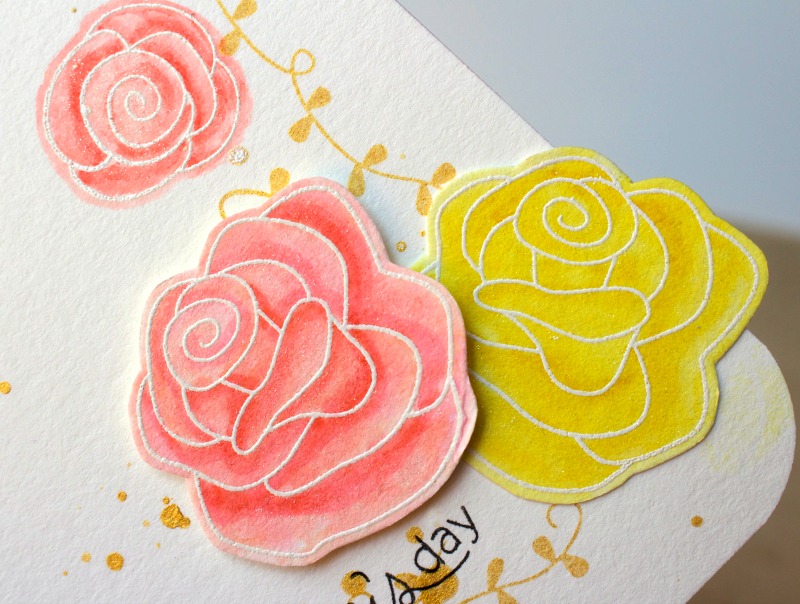
The line drawn roses were just begging me to watercolor them!  Hee!  I stamped the larger roses onto watercolor paper with Versamark and embossed them with white powder.  I used my Distress markers to color them in a little and then blended with my aqua pen.  I had so much fun painting them!  Once they were dry, I fussy cut around them.

While my roses were drying, I created my card base.  I used watercolor paper as my base and rounded the bottom right corner.  I stamped the vines with gold Delacata ink and added a couple of embossed small roses as well.  I watercolored the small roses in the same way I had the large.  Next I added a splattering of gold mist.

Once everything was dry, I added the large roses to the corner and stamped the sentiment in black Versafine ink.  This one was so fun!

Newton's Nook Designs Mother's Day Card 2- Tessa Wise

Would you like to win Love Grows?  
This set will be given away to Two lucky winners

Here's how to win: 

Comment on the NND blog and Design Team and Guest blogs (see list below)! Two winners will be chosen at random from the collective blogs release posts. Make sure to check out each of their blogs and comment for your chance to win. You will not know which blog has been chosen so the more you comment on the better your chances are of winning! You have until Thursday, April 17th at 9 pm Central Standard Time to comment  -- winners will be announced on the blog post on Friday, April 18th
We are also having a giveaway this week on our Facebook Page so make sure to head over there to enter that too! 

Check out all these awesome Design Team and Guest Blogs below to enter:

Jamie Greene  - Guest Designer
Elena Joldersma - Guest Designer

I hope you have time to pop through everyone's blog!  Todays cards are beautiful!!
post signature

Friday, January 24, 2014

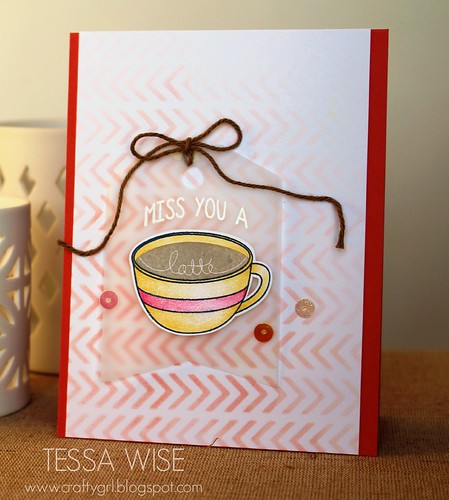
Miss You A Latte Card

Hello!  I don't usually post more than once a day but I decided this afternoon to take the latest class over at Online Card Classes.  This one is all about stencils!  Since so many companies are coming out with them this season, I thought I could brush up on some fun techniques.  Anyways, I'm posting to share the first card I was inspired to make:

Miss You A Latte Card

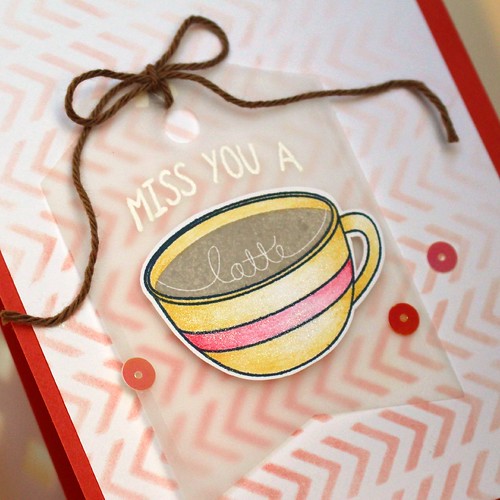
This one was inspired by the first video I watched by Debbie.  I wanted to make something soft and pretty and use the white embossing on vellum like she did.  I love how it turned out and I already know just who I'm sending this one to!  The stamps are by Reverse Confetti and the stencil is by Teresa Collins.  I used my Cameo Coral and Crisp Cantaloupe inks by Stampin' Up! with a blending tool to create the background and my Prismacolor pencils to color my latte cup.

Miss You A Latte Card 2

So far the class has been fun!  The ladies running it and their guest teachers are such a great bunch and they make the happiest videos!  I hope to create a card inspired by each one! :)

Well, hope you have a great weekend!  I may pop on again if I get another card done- hee!

-tessa

Wednesday, January 22, 2014

A Few Cards...

It is my turn to share on the Teresa Collins Designs team blog today!  I had so much fun making the cards, I thought I'd share them here, too!  I chose the Save The Date Collection to work with- mainly using the 6x6 patterned paper pad with lots of the beautiful embellishments!

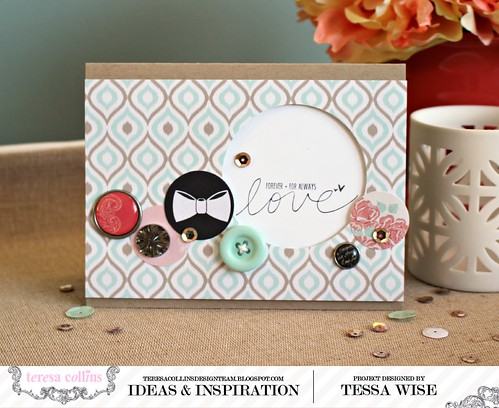
My first card features one of the stamps from the Save The Date stamp set:

Inset Love Card 1

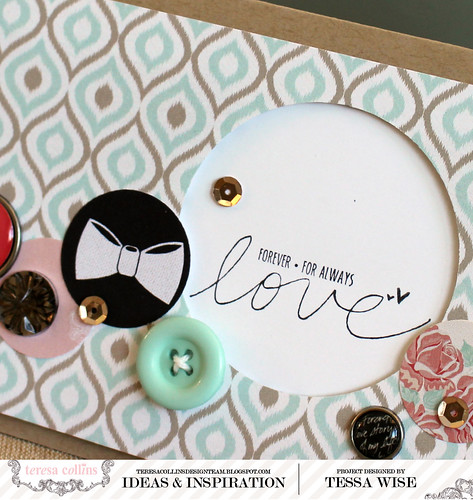
I love the sentiment and wanted it to stand out on my card.  I stamped it onto white cardstock with black ink and adhered it to my brown card base.  Next I cut my patterned paper to fit over the center of the card.  I punched the circle over where the sentiment was and used pop up foam adhesive to adhere it to my card from to frame the sentiment.  It gives the card a little extra dimension!

Inset Love Card 3

I chose some ephemera pieces, stickers, jewels, brads, buttons, and sequins to embellish this card- they are all circles but in many different sizes that work well together.

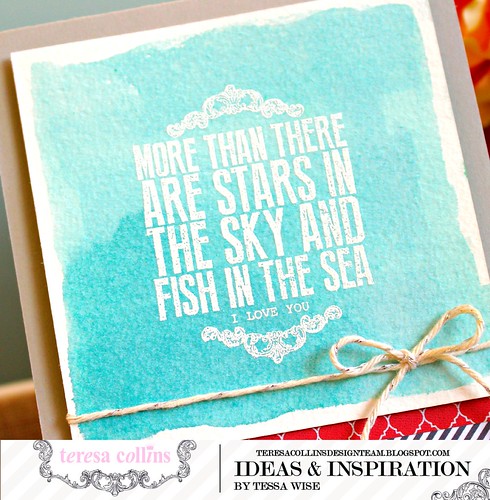
I feature another beautiful stamp from the Save The Date set on my next card:

Stars In The Sky Card 2

I started with a tan card base and added the strips of patterned paper near the bottom.  Next, I took a square of watercolor paper and painted some of my favorite blue stamping ink onto it with an aqua brush.  I dried it with an embossing gun.  Once it was dry, I stamped it with Versamark ink and heat embossed the sentiment with white embossing powder.  The sentiment really shines!  I added a little bit of gold twine to finish off the look.

Stars In The Sky Card 3

It is such a pretty stamp isn't it?  I really love it!

And one more to share today- I used some of the great Basically Essentials Modeling Paste and Stencils on this one:

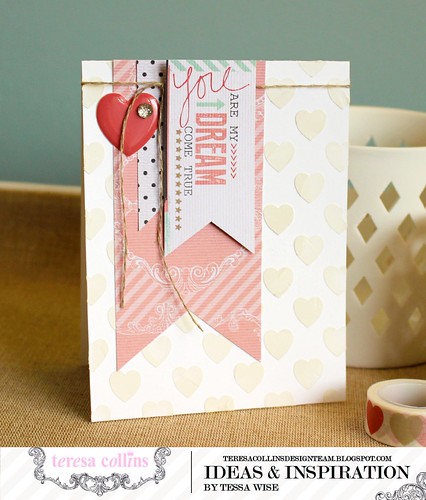
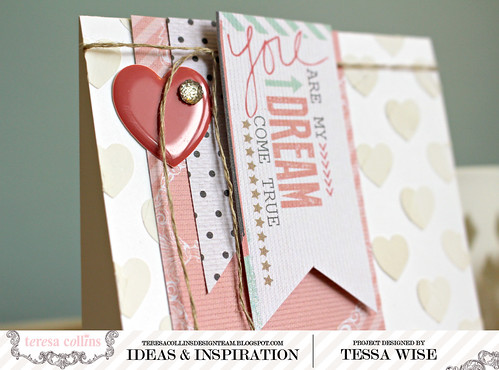
You Are My Dream Card 1 

I started with a crisp white card base and used the hearts stencil with the paste.  I love the texture!  It creates such a pretty pattern on the white!  Once the paste was dry, I added a banner of the pink patterned paper, the smaller polka-dotted paper, and a banner from the ephemera pack.  I tied a bit of linen thread around the top and finished it off with the epoxy heart and jewel.

You Are My Dream Card 3

I am so happy with how these turned out!  I love using different techniques on each card- they were so fun!!  I hope you try out one or all of these techniques for yourself!

Thanks for joining me today!

-tessa


Supplies Used:
Teresa Collins Designs: Save The Date 6x6 Paper Pad,  Save The Date Sequins, Save The Date Gems, Save The Date Decorative BradsSave The Date Clear Stamp Set, Save The Date Decorative Stickers, Save the Date Epoxy Dots, Basically Essentials Modeling Paste, Basically Essential Stencil Pack #3, Basically Essential Pallet Knives
Other: Cardstock by Stampin' Up!; Linen Thread by Stampin' Up!; Blue Ink- Baja Breeze by Stampin' Up!; Black Ink- Versafine Onyx Black by Tsukineko; Gold Twine by The Twinery; White Embossing Powder by Stampin' Up!

Wednesday, December 11, 2013

Artsy New Goodies From Stampin' Up!

Every now and then I get asked to make some samples for my Stampin' Up! demonstrator- and of course I always say yes!  I love playing with new goodies!  She popped by with some of the new products from the upcoming Celebrate the Everyday Catalog and I got right to work.  Here are the cards I made:
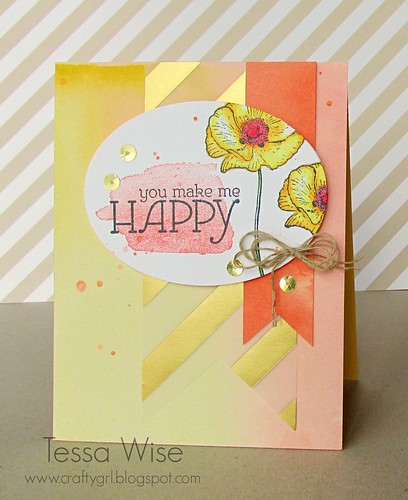
Happy Flowers Card 1

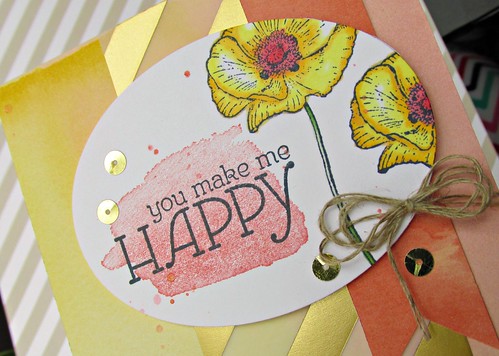
This first one features the beautiful Happy Watercolor stamp set along with the Fancy Foil Designer Vellum, and Watercolor Wonder DSP.  They are all gorgeous- seriously!  The flowers, paint splotch, and sentiment have been stamped on Whisper White cardstock that I die-cut into an oval.  The flowers were watercolored with residual inks.  I've added a little splatter with a Cameo Coral reinker mixed with water and a few gold sequins, also new in the catalog

Happy Flowers Card 2

Aren't the touches of gold pretty?  I wish I had the gold baker's twine to do my bow with, too!

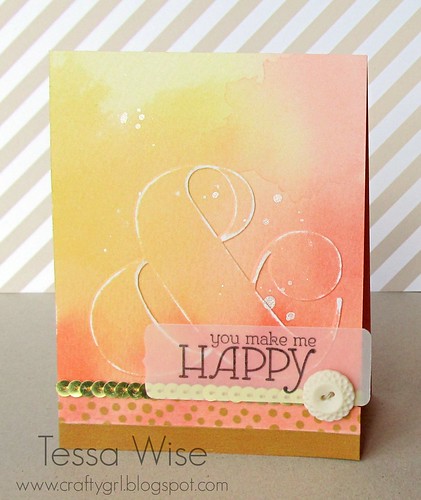
The second showcases the new Ampersand embossing folder along with the Watercolor Wonder washi tape, Gold Sequin Trim, and Watercolor Wonder DSP.  I can't get enough of that DSP!!

Ampersand Card 1

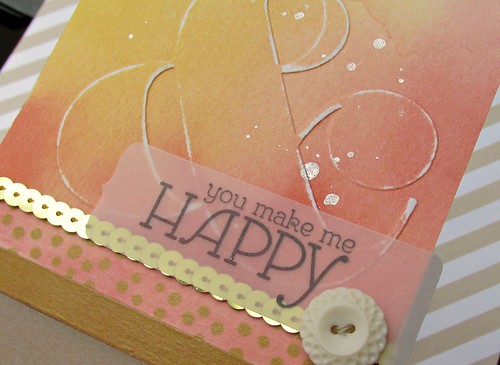
I love this embossing folder!  The large ampersand is so cool!  I've embossed my card front and then sanded over it a little so it would stand out a bit more on the dsp.  Next, I added two of the new gold washi tapes to the bottom of the card along with a big of the pretty gold sequin trim.  I stamped my sentiment (from the Happy Watercolor set) onto vellum and die-cut it using one of the Chalk Talk dies.  Lastly, I embellished it with a pretty button and a splatter of shimmer spray.

Ampersand Card 2

I loved the look of this paper in the book and it doesn't disappoint!  The full watercolor sheets are my favorite!

One more card- this one is clean and simple:

Cantaloupe Thank You Card 1

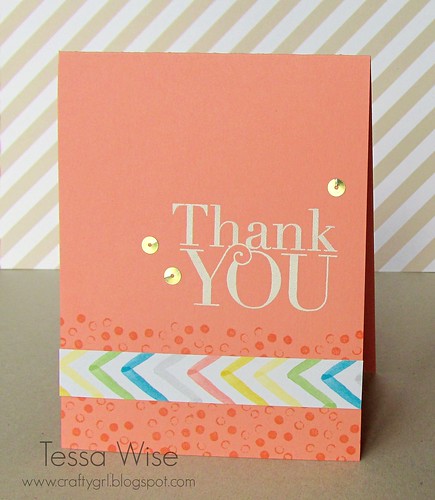
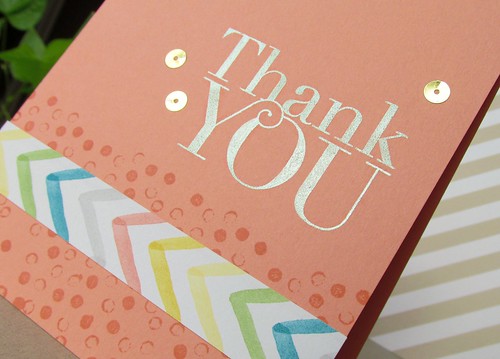
I started with a card base of Crisp Cantaloupe.  I then stamped the watercolor polka-dots (from the Happy Watercolor set) along the bottom with matching ink.  I added just a strip of the multicolored chevron print.  Next, I stamped and embossed the sentiment (from the Another Thank You set) and then I added a few sequins for accent.

Cantaloupe Thank You Card 2

The colors in the Watercolor Wonder suite were so fresh and fun to play with!  I really enjoyed the new goodies and I can't wait until January to order!  I am loving so much out of the mini!!

Well, hope you are having a great day!

-tessa


Tuesday, September 10, 2013

Hello Dahlia Cards

Hi!  I found some time over the weekend to create a couple of cards and thought I'd share them with you today!  I used my new Stampin' Up! goodies I picked out from the new catalog- the new Regarding Dahlia was my first pick!  Here are the cards I made:


Since the dahlia stamp is so detailed and beautiful on its own, I decided to keep my cards clean and simple.  I started out with a piece of watercolor paper and watercolored a square using my Crushed Curry ink pad.  Isn't it such a pretty yellow!  I waited for it to dry completely and then with the help of my embossing buddy, embossed the dahlia and sentiment using white embossing powder.  It looks really pretty against the yellow!


I created a card base of Sahara Sand cardstock.  For contrast, I added a bit of Midnight Muse cardstock with some faux stitching on it along with the watercolored panel to my card front.  I embellished it with one of those fun wooden buttons and some linen thread.

For my next card, I started with another Sahara Sand cardbase:

I stamped the dahlia in Midnight Muse ink towards the bottom left corner.  I added a strip of Crushed Curry cardstock and a small bit of Midnight Muse cardstock along the bottom using dimensionals.  I wrapped it with some linen thread and finished it off with another wooden button.


I splattered just a little SC Calico Shine mist over it and then added my sentiment banner just under the button.  The banner is from the gift box kit from the SU! spring mini and the sentiment comes from the You're My Type set.

I'm so happy with how these cards turned out!  I'll be grabbing these colors again, too!  In fact, I had to put in another order to get more of this pretty yellow paper! :)

Thanks for stopping by today!

-tessa

Tuesday, June 18, 2013

Teacher Cards

Hi There!  Well it's Tuesday!  It's also the last day of school for us this year!  It's amazing how fast the school year went--  I can't believe that I'll have 1st and 3rd graders in a few months!  Today I wanted to share a couple of the cards I created for my girls' teachers this year.  I am so thankful for the staff at their school!  We have had a great year and I've seen my girls grow so much!  I know a lot of it has to do with school and especially their teachers!

For these cards, I used Lawn Fawn's A Good Apple set.  I love how the mini chalkboards turned out!


This one is for Zoey's teacher.  He is so great!  For this, I used Simple Stories 24/7 line.  I kept it simple to let the sentiment shine!


Here is Natalie's teacher's card:


I used Pebbles Inc. Lakeside collection.  Again, I kept it simple!


I had lots of fun stamping these little chalkboards!  Of course, both girls said "Mom, you know we have white boards at school, don't you?"  lol!  Times have changed!  Maybe I'll try a white board next time! Wouldn't that be cute with neon embossing powder?

Well, hope you are enjoying your day!  I'm going to get these kids to school and then run my errons!  Happy last day of school! :)

-tessa
 
site design by designer blogs