Showing posts with label Reverse Confetti. Show all posts

Friday, August 7, 2015

A Project Runway Challenge- Mad Dash Mayhem

So guess what show came on last night??  Season 15 of Project Runway!!  I am always so inspired by this show- even though I'm a card maker and not very fashion forward lol!  I love the challenges, the fabrics, and the looks the contestants all pull together!  It's just so fun!  Last year I played along with some of the challenges- it was so out of the box for me and I had a lot of fun with it!  I'm going to be playing along this year too and thought I'd invite everyone to play along with me!  What do you think??


For this week's challenge, set your timer for 1 minute and gather a kit together.  You will use what you grab to make your card.  Don't forget to grab your scissors and adhesive- you probably don't have anyone to borrow from in your craft room, right?  (PS- who shows up for Project Runway without their scissors?)  Make a card inspired by one of the top 3 or bottom 3 looks.  Don't forget to show us who you are as a designer!  When you're finished, add your card to the link up below.  You'll have until Thursday, August 20th to play along with this challenge.

I pulled together a few supplies with Ashley's winning look in mind:


Here is what I came up with:


I grabbed my new Pineapples A Plenty Stamp set and die from Reverse Confetti for this one.  I knew I was going to use yellow and I was inspired by the cute pineapple t-shirt Ashley was wearing during the episode.  I also grabbed some tan and white cardstock, a circle punch, a sticker sheet from Bella Blvd and sticker stitches from SRM that were already on my desk, my favorite mist, gold thread, and a pack of sequins.  All of my favorites! :)

I kept the design simple going for a collagy look with a cluster at the bottom of the card front.  This is definitely all me- including a little sass with that sentiment! :)  Here's a closer look:


I hope you'll join me in the challenge!  It's just for fun but I might put together a little giveaway if I get enough people interested in playing along.
post signature


Thursday, June 12, 2014

Urban Market Cards for Teresa Collins Designs

Hello there!  I have two cards to share today using the beautiful Urban Market collection by Teresa Collins Designs.  The patterned papers were really inspiring me this week:


I paired the Urban Market patterned papers with the chipboard stickers, decorative tapes, and sequins for these cards.  I love playing with all the bits and pieces!

The blue tiled patterned paper (dots) is so pretty!  I had to use it on a card:


I started with a kraft card base and added a panel of the blue patterned paper (dots) to the center, leaving 1/4" around the sides and top. Next, I diecut a panel of the chevron glittered paper (zig) with the Avery Elle Custom Panels dies so it had a rounded edge.  I decorated the glitter panel with a couple of the decorative tapes, a faux stitching sticker from SRM, and a bit of linen thread.  I added the fleur de lis chipboard piece over the top of it all.  I added my sentiment, also from Avery Elle on vellum and diecut it with the label die from the Custom Panels die set so that you could see all the good stuff going on underneath.  I embellished it all with those beautiful silver sequins and added the rounded panel to my card using the foam squares found in the Teresa Collins Adhesive Kit by Xyron.  The dimension is perfect!


For my next card, I chose a pretty journaling card from the cards patterned paper as my focal point:


I started with another kraft colored card base.  I added the larger dots patterned paper (zig) to the center of my card front.   I cut out the journaling card with stripes and damask from the cards paper and stamped my sentiment from Reverse Confetti on it.  I embellished with more of the faux stitching sticker from SRM, some fun decorative tape and a bit of linen thread.  I added a couple of staples to hold it in place using my pink Teresa Collins stapler from Xyron.  Over the top of the flat items, I added a couple of smaller chipboard pieces and finished off the look with those awesome woodgrain and striped sequins:


I used the foam adhesive squares again to add the panel to my card front, adding just a strip of the blue floral print (floral) patterned paper peeking out from the bottom edge.

Each time I pull out the Urban Market collection I love it more and more!  I have been using the decorative tapes, the sequins, and the glitter paper on all of my cards- they are my favorites right now!

Hope you have a great day- if you have time and haven't voted yet, please pop over to the Paper Crafts and Scrapbooking Magazine's Gallery Idol contest page.  Voting ends today at noon!

post signature

Monday, June 2, 2014

Be Awesome Card for Gallery Idol Round 3!

Hi!  I am so happy to be playing along with Round 3 of Paper Crafts and Scrapbooking Magazine's Gallery Idol Contest!  This round is all about stencils!  I love playing with stencils and had lots of fun with this challenge!  I pulled out my all time favorite stencil sheet for this card:


I think the days of the week stencil from the Basically Essential stencil pack #2 by Teresa Collins Designs is so cute!  I was inspired to use it because of this fun sentiment by Mama Elephant.  It was sitting on my desk and I thought they'd be a perfect pair!

I used  the Basically Essential modeling paste by Teresa Collins Designs over my stencil and let it dry.  Next, I pulled out some of my Stampin' Up! ink pads and watercolored over the days of the week using 2 colors for each day.  The bright colors are so pretty and vivid in real life!  I love the way they look over the kraft card base.

I cut a piece of vellum into a circle and then stamped my sentiment using Staz On ink.  I added a scallop border along the bottom (Lawn Fawn paper and Reverse Confetti die) and then wrapped a bit of twine from SRM around it, ending in a bow.  I added a few epoxy hearts from We R Memory Keepers to embellish my sentiment.


It has been so fun playing along with the Gallery Idol contest this year!  Thanks again for all your votes and cheer leading!  I love reading the kind comments you've left here, at the contest page, and on Facebook- they really mean the world to me!

If you'd like to vote for me again this round, I'd love it! Pop over to the Gallery Idol Contest page to vote and to check out the rest of the entries!  Such beautiful work!!

Hope you have a great day!

post signature

Friday, May 16, 2014

Embossed and Embellished Cards for Teresa Collins Designs

Hello and happy Friday!!  It's a rainy day here but that's ok- I'm busy prepping for a fun class I have tomorrow! :)  It's a good excuse to watch a movie and stamp too!

Today I want to share a couple of cards I created for the Teresa Collins Designs team blog this week.  I just love how they turned out!  Really, whenever I use my eBosser and TC embossing folders I love how my projects turned out! lol!  For these cards, I paired the embossing with the new Urban Market collection that is available now.

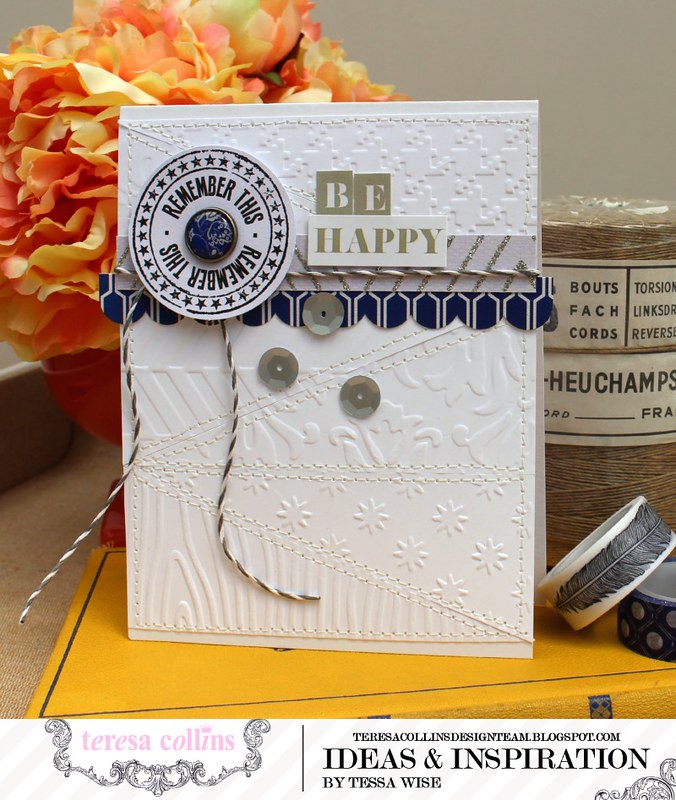
This first one was inspired by a triangle quilt I saw online.  I loved the stitched pattern and and although it was done in colorful fabrics, I couldn't wait to try an all white, embossed version of it!

TERESA COLLINS DESIGNS Be Happy Card 1

I started by cutting 6 4.25 x 1.75" strips of white cardstock.  I ran each of them through the eBosser using a different embossing folder.  Once they were embossed, I cut them in half diagonally to make 12 triangles.  

Starting at the bottom of the card, I adhered the triangles to a white card base using my Teresa Collins Mega Runner by Xyron.  I was careful to keep the adhesive in the centers of each triangle so I could easily sew over each piece.  Once they were all in place, I sewed around each triangle with my sewing machine to create the quilted look.  

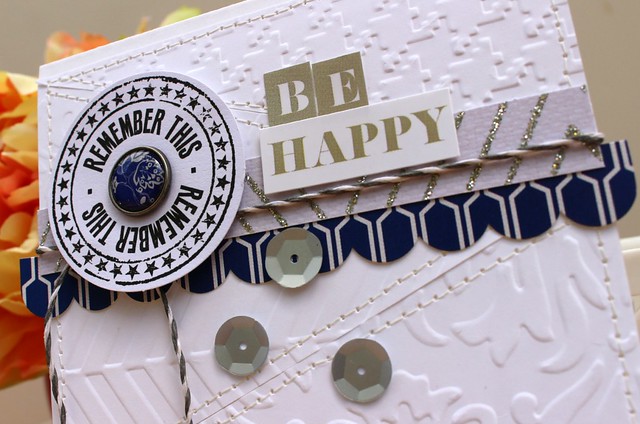
Once my embossed card base was finished, I added the embellishment cluster to the top of my card.  I started with the blue tiled scallop sticker strip from the Urban Market sticker sheet.  I added a strip of the glittered Zig patterned paper next and then tied a length of twine around the card.  I found the Remember This die cut circle in the Urban Market ephemera pack and embellished it with a blue floral brad from the Urban Market designer brads.  I added it to the card using dimensional foam adhesive.  I created the sentiment from the Urban Market Alpha and Label sticker sheet.  To finish off the look, I sprinkled a few sequins below the cluster.

TERESA COLLINS DESIGNS Be Happy Card 2

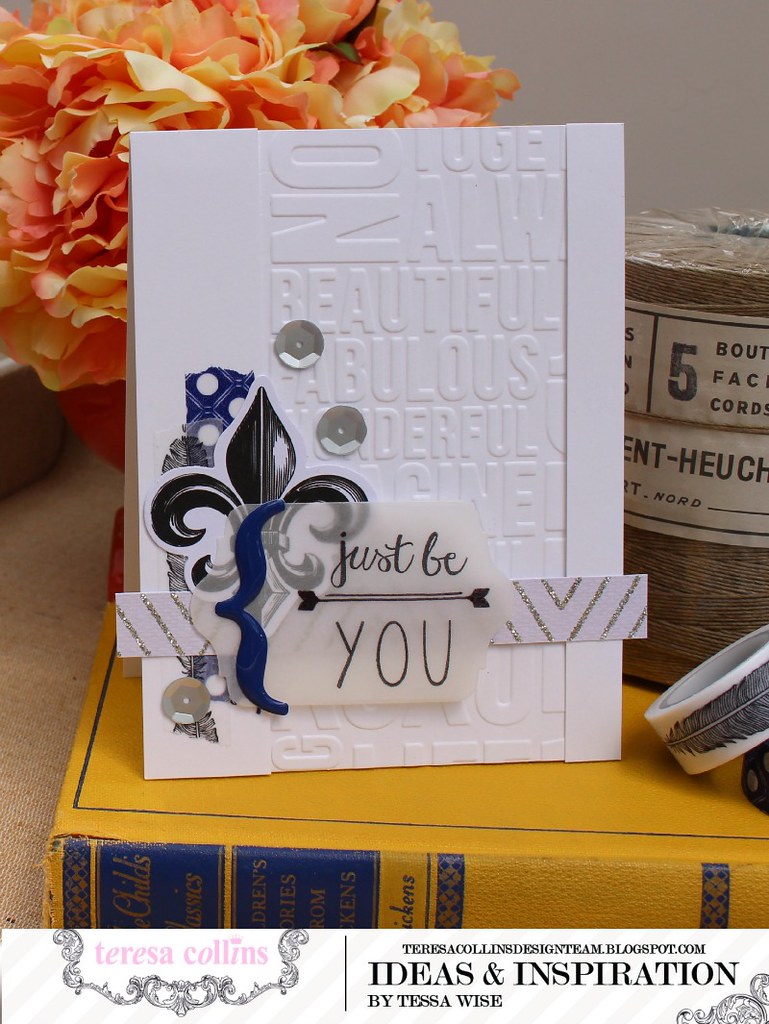
I have had this second idea in my head for awhile.  I love the look of an embossed strip down the front of a card but wanted to modernize it a bit.  This turned out exactly like I wanted it to:

TERESA COLLINS DESIGNS Just Be You Card 1

I cut a 5.5 x 2.75" panel of white cardstock and embossed it using the Beautiful Words embossing folder.  Cutting out the panel before you emboss means you can place the panel over the words you want to capture when you emboss.  I loved the list of beautiful, fabulous,  and wonderful so I placed the panel over this area of the folder and ran it through my eBosser.

I created a card base out of white cardstock and adhered the embossed panel onto the card 1/2" from the right side.  I then cut two strips of cardstock- one 5.5 x 1/2" and the other 5.5 x 1".  I used thin foam adhesive to add them to either side of the embossed panel.

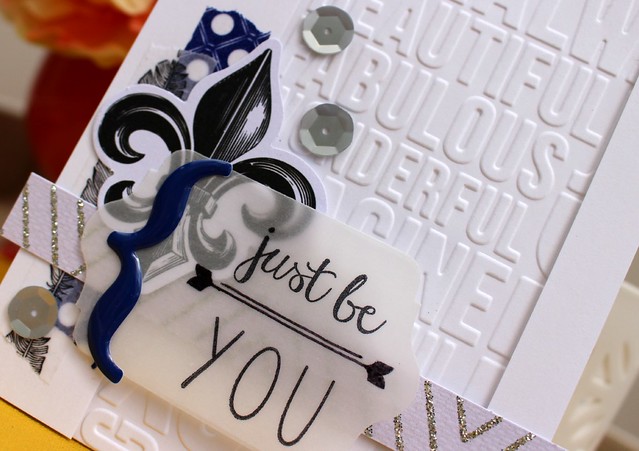
Next, I embellished the card with some of my favorite new products from the Urban Market collection.  I used the feather and blue tile decorative tapes on the left side first.  Then I added a strip of the glittery Zig patterned paper across the bottom.  I added the fleur de lis from the Urban Market ephemera pack and pulled out my stamps.  This sentiment is from the All About You set by Reverse Confetti.  I stamped it onto a diecut vellum label with Staz On ink.  I added the epoxy bracket sticker to the left so that I could hide my adhesive underneath it.  I used the Teresa Collins Clear Hold Adhesive by Xyron to adhere the vellum to the card.  Lastly, I added just a few pretty silver sequins to finish off the clustered look.

TERESA COLLINS DESIGNS Just Be You Card 2

The embossing you get with the Teresa Collins eBosser folders by Craftwell is so crisp and perfect!  It automatically gives anything you create a sense of elegance.  It is always so fun making cards with them!

Thank you for stopping by my blog today!
post signature

Saturday, February 8, 2014

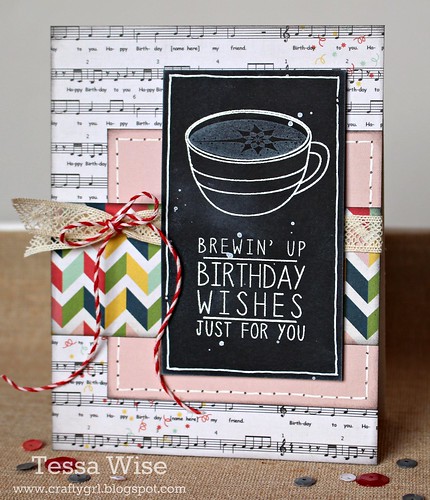
Brewing Up Birthday Wishes Card

Happy Saturday!  My day is super busy- I'm teaching two classes at my local scrapbook store, Scrapdoodles today!  I love teaching and todays classes will be so fun!!  After that, my girls are going to a sleepover birthday party which means date night for me and my hubby!  No complaints here! :)

Before I got started on my day, I thought I'd share a card I made using the fun Be A Barista set by Reverse Confetti.  I used this month's Sketch For You To Try for it:

Coffee Chalkboard Card 1

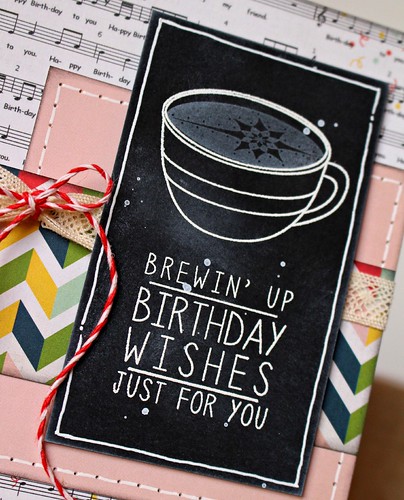
I created a mini chalkboard by stamping the coffee cup and sentiment on to a black cardstock panel with Versamark.  I heat embossed it using white powder and then doodled around the edge with a white gel pen.  I stamped the coffee with Whisper White ink and then used a sponge to ink around the edges and in a few random places on my panel.  I splattered it with white mist and let it dry.

The patterned papers are from the Carta Bella It's a Celebration collection- I used the 6x6 pad.  I cut out all my patterned papers and inked around the edges of each piece with a black cat eye ink pad.  Mine's dried out a little and perfect for this!  I did a little faux stitching around the pink panel, too:

Coffee Chalkboard Card 2

Wasn't the sketch cute this month?  I loved it!  I'm so glad I had a little time to play along yesterday.   

Well, I better get in gear and head down to class.  Hope you have a great weekend!!

-tessa

Friday, January 24, 2014

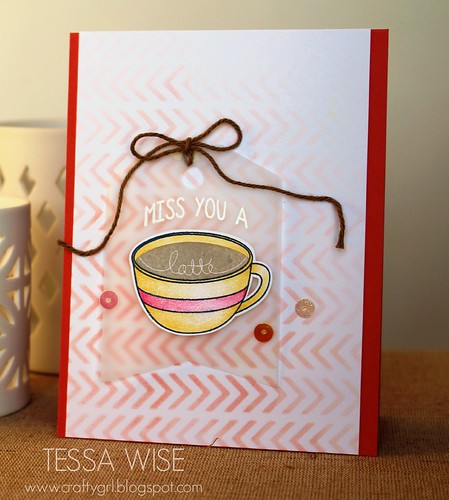
Miss You A Latte Card

Hello!  I don't usually post more than once a day but I decided this afternoon to take the latest class over at Online Card Classes.  This one is all about stencils!  Since so many companies are coming out with them this season, I thought I could brush up on some fun techniques.  Anyways, I'm posting to share the first card I was inspired to make:

Miss You A Latte Card

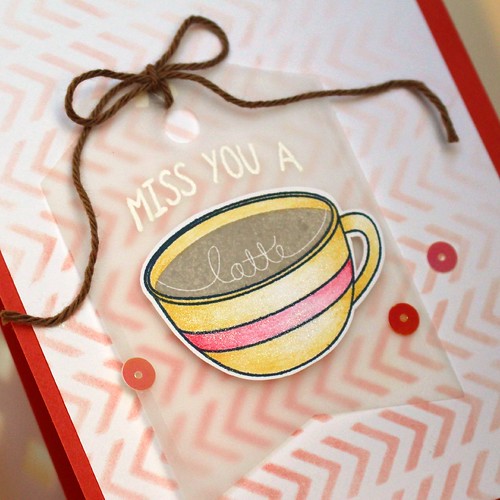
This one was inspired by the first video I watched by Debbie.  I wanted to make something soft and pretty and use the white embossing on vellum like she did.  I love how it turned out and I already know just who I'm sending this one to!  The stamps are by Reverse Confetti and the stencil is by Teresa Collins.  I used my Cameo Coral and Crisp Cantaloupe inks by Stampin' Up! with a blending tool to create the background and my Prismacolor pencils to color my latte cup.

Miss You A Latte Card 2

So far the class has been fun!  The ladies running it and their guest teachers are such a great bunch and they make the happiest videos!  I hope to create a card inspired by each one! :)

Well, hope you have a great weekend!  I may pop on again if I get another card done- hee!

-tessa

Wednesday, January 15, 2014

Newton's Nook Designs January Release: Love a la Carte

Hello there!  It's release week for Newton's Nook Designs!!


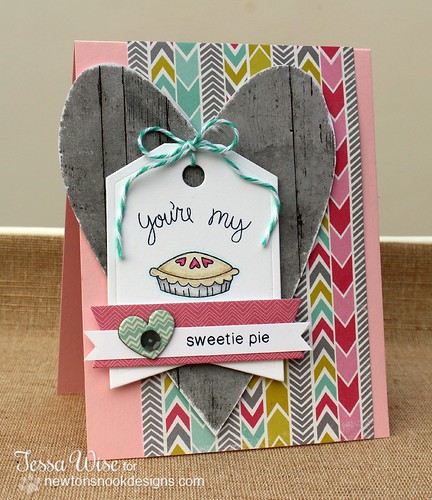
Today we are featuring the adorable new Love a la Carte set.  It's got the cutest little images for Valentine's day- all related to food!  Here is what I made with it:

Sweetie Pie Card 1

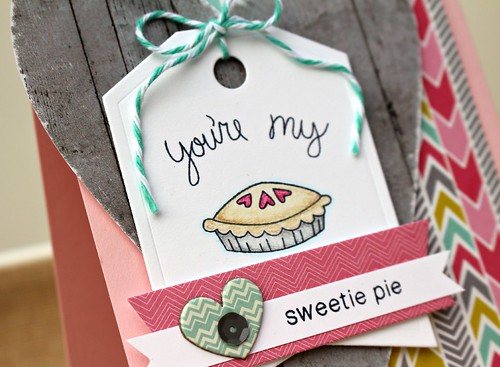
I used the pie image, coloring it with my Prismacolor pencils.  It's adorable all on its own but the sentiment makes it even better!  The sentiments are mix and match style so you can create your own- I love that!

Sweetie Pie Card 2

Now I know you'd love to win this set, right?  Newton's Nook Designs will be giving it away!  Here are the details on how to win:


Would you like to win Love Ã¥ la Carte? This set will be given away to Two lucky winners
Here's how to win: 
Comment on the NND blog and Design Team blogs (see list below)! Two winners will be chosen at random from the collective blogs January release posts. Make sure to check out each of their blogs and comment for your chance to win. You will not know which blog has been chosen so the more you comment on the better your chances are of winning! You have until Thursday, January 16th at 9 pm Central Standard Time to comment  -- winners will be announced on the blog post on Friday,January 17th.
Check out all these awesome Design Team Blogs below to enter:


I hope you get a chance to pop through the Design Team blogs to see what they made!  They are such a talented bunch and it's always so fun to see what everyone did with the same set.  You can check them out at the Newton's Nook Designs blog as well!

Thanks for stopping by today!  Don't forget to leave a comment for your chance to win!

-tessa

Monday, December 9, 2013

Coffee and Friends Warm the Heart Card

Hi!  It's Monday but it doesn't feel like it- my girls are home from school because of the icy weather we woke up to.  Snow days are always fun and we are definitely enjoying it!

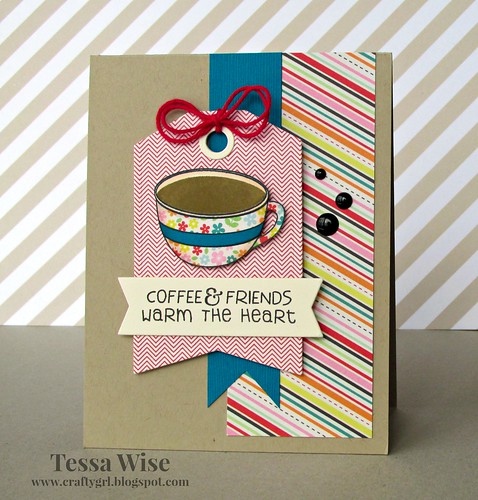
Today I wanted to share a card I made over the weekend.  I pulled out my newest goodies from Reverse Confetti to play along with their December Sketch For You To Try.  Here's my card:

Coffee Card 1

Great sketch, right?  I really enjoyed it!  I also enjoyed playing with the adorable Be a Barista set- being a coffee lover, it's right up my alley!

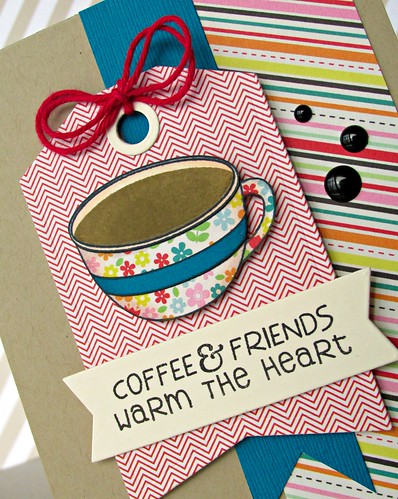
I paper pieced my coffee cup using some fun prints from the Pink Paislee Hey Kid mini pad.  I added some shadowing with my Copic markers and then added it to the center of my die-cut tag.  I added the sentiment last, die-cutting a banner to put it on.

Coffee Card 2

I'm so glad I found some time to play along with their challenge!  Pop over to the Reverse Confetti blog to see the original sketch.

Thanks for stopping by today!

-tessa

Tuesday, November 19, 2013

Some Memorabilia Projects for Teresa Collins Designs

Hi!  It's my day to post on the Teresa Collins Design Team Blog and I thought I'd share my projects here, too!  Cards are my favorite thing to create so of course, that's what I started with this week when I had some time to craft.  I pulled out the Memorabilia collection and got to work! :)  First I made a collage style hello card:


Collage style cards are my favorite!  I love adding the layers and textures one at a time, building up into the look I'm going for.  With this card, I started with a pale blue card base.  Next, I cut a panel of the Document patterned paper and splattered it with mint colored mist.  Once it was dry, I stamped the hot air balloon from the Memorabilia stamp set.  Then I added my doily, folded in half and layered some Memorabilia washi tape over the seam.  I wanted to add some banners next- I chose two, one from the Memorabilia sticker sheet and one from the chipboard elements.  I added the twine next, tying it in a bow.  My last layer was the cute sentiment from the Memorabilia sticker sheet.  I added it to the card front with dimensional adhesive and embellished it with a couple of epoxy dots.  I finished by adding the panel to my card base with dimensional foam adhesive.


Aren't the layers fun?  :)  After I finished my collage style card, I wanted to do something simple.  The banners on the Recorded patterned paper inspired this one:


I cut a panel out of the Recorded patterned paper out so that the banners would run along the top of my card.  I stamped the sentiment (Lots to Say set by Reverse Confetti) in the lower right hand corner using Versamark ink and then embossed it with white embossing powder.  I flicked the panel with white mist and let it dry.  Once it was dry, I lightly sponged white ink around the edges of the card front.  Lastly, I embellished with the Memorabilia epoxy dots.


It's an easy to make card with a big impact I think!

After two cards, I was ready to create something a little different.  I grabbed a clear pillow box from SRM Stickers to decorate- it's the perfect size for a gift card or a small treat:


I started this project with some found items.  I tore a page out of an old book and wrapped it around the center of the pillow box.  Next, I wrapped it with some dark gray yarn.  I cut a heart out of the Quatrefoil patterned paper and added it to the center using dimensional adhesive.  The sentiment banner came next- it's from the Memorabilia die-cut sheet.  Lastly, I embellished it with some of the pretty Memorabilia sequins.  I just love them!


I really enjoyed creating these projects!  The smaller canvas of cards and goodie boxes is perfect- not too much space to fill and so fun to give away!

Thanks for joining me today!

Supplies Used:
Teresa Collins Designs: Memorabilia 12x12 papers, Memorabilia Sticker Accessory Sheet, Memorabilia Sequins, Memorabilia Chipboard Elements, Memorabilia Epoxy Dots, Memorabilia Decorative Tape, Memorabilia Die-cut Sheet
Other: Cardstock by Stampin' Up!; Twine by The Twinery; Sentiment stamp by Reverse Confetti; Clear pillow box by SRM Stickers; Doily by Stampin' Up!; Mists by Studio Calico and Dylusions

 
site design by designer blogs