Showing posts with label Birthday Card. Show all posts

Monday, September 19, 2016

Mini Gift Bags

 I have a card to share inspired by the latest Waffle Flower Challenge today!  I used the cute new Little Gifts 3-D Die for this birthday card:


I cut out a bunch of the mini bags and toppers to begin with.  Some were cut from cardstock and others from patterned paper.  I added a couple of patterns and accessories from the Little Gifts Stamp Set.  The mini tag also comes from there!  Once they were all stamped, I placed them on top of a panel cut from the Lacy Layers 2 Die.  I added a sentiment from the Bowtiful Stamp Set as well.

I chose a fun, bright pink cardbase for this one.  I used the little swirl and dot stamps from the Peace on Earth Stamp Set to create a birthday-worthy background.  Stamping it with Versamark gave it a tone on tone look.

I hope you'll join us for our challenge this month!  The inspiration colors are so fun this time around!  Pop over to the challenge post on the Waffle Flower Blog for more information!

-tessa

Wednesday, July 20, 2016

A Sketchy Birthday Card

Hello!

Happy Wednesday!  I though I'd pop on early this morning and share a card I made for this week's Watch It Wednesday series for Waffle Flower Crafts!  You'll have to pop over to the Waffle Flower Blog to check out the video but here is a look at the card I made:


I went for a fun, layered look with this one!  I used the Sketchy Numbers Stamp Set along with the Lacy Layers Die to create my card along with some fun new embellishments from my stash.

I created a layered background that peeks through the vellum and heat embossed the focal image with white embossing powder.


Hope you enjoy the video!  I am hoping to get a few cards made this afternoon :)  There are only a few errands on my list today- including a trip to the craft store!  Fun Fun Fun!

Thanks for stopping by!

-tessa

Thursday, August 27, 2015

A Happy Birthday Card for Waffle Flower Crafts

Hi!  Our last adventures of summer have come to an end and I'm on my new fall schedule which seems to be a little bit of a juggle for me!  I am hoping to be back to posting more than once a week in a few more days...  The girls go back to school on Monday so with the house quiet, I bet I'll be more than inspired to chat with everyone in blogland!  I'm currently working on new release cards for Waffle Flower and boy are they fun!!  I'll have a lot to share in another week or two! :)

Today I have another Waffle Flower Crafts card to share with you!  I featured the awesome Papercut Alpha Die on this fun birthday card:


I borrowed the happy and cute heart stamps from the Bowtiful Stamp Set.  This one didn't need a lot of embellishment to let that sentiment shine!  I picked a bold pattern paper to back the sentiment panel and added a little shimmer with gold thread and sequins popping out from underneath.


This one is fun and bright and happy!  Perfect for the friend I made it for!  Her birthday is today and I can't wait to give it to her :)

Hope you all have a fun and happy day too!  Thanks for stopping by today!
post signature

Thursday, June 18, 2015

Make a Wish Card for SRM

Hi!  I'm sharing a card on the SRM Stickers Blog today!  It's a birthday card for one of my girlfriends:


I think I have all my favorite things on this card!  A little stamping, an adorable 4" White Lace Doily, sequins, a Glassine Bag, and a We've Got Your Sticker- Birthday Sticker Sheet which has sentiments, images, and sticker stitches all in one!  
I started with a pink card base and stamped some random pink dots diagonally across the card front.  I added a strip of pink patterned paper to the top and then filled a glassine bag with a gift card to my friend's favorite place- Starbucks!  
I adhered the bag to the card front and then added a folded 4" White Lace Doily over the top.  I folded the bag's flap down and added a sticker stitch from the We've Got You're Sticker- Birthday Sticker Sheet along the edge.  I added the cupcake sticker to a Medium White Scallop Punch Piece and then added it to my card front with some foam adhesive tape.  I added the sentiment to the bottom of the glassine bag.  The sequins were a finishing touch- playing on the circle theme and adding a little sparkle! 


This one was so fun!  Thanks for stopping by!
post signature

Tuesday, June 9, 2015

An Otterly Birthday Card

Hi!
Today I'm working on a few fun projects involving some cute new stamps I got over the weekend!  New goodies are always fun, aren't they? :)  I love it when something sparks my creativity!  Today I'm sharing a card inspired by the current Lawnscaping Challenge:


One of my favorite things about Lawn Fawn is all the cute critter stamps!  I can't get enough of them!  I am so happy I had time to play along with the challenge.  Here is what I made:


I have loved otters since living in Monterey, California.  Have you ever been there?  I would spot otters swimming around in the bay on my walks home from work- they are sooo cute!  One of many things I miss about living in Monterey :)

I colored this guy from the Year Five Stamp Set with Stampin' Up! Blendabilities and cut him out.  I made cut some Lawn Fawn patterned papers into waves and then cut them into an oval shape.  I added the bits and pieces to the oval base with foam adhesive to add some dimension.

I wanted a carefree fun feeling to this card so I splattered my white card base and added some random waves stamped behind where the oval would go.  I added a wad of thread and then placed my focal point over it.  I sprinkled some sequins over the card and glued them down where they landed. :)


This little cutie sure makes me smile!  Hope you're having a great day and thanks for stopping by!
post signature

Thursday, May 22, 2014

A Happy Birthday Card

Hi there!  I spent the day visiting the National Museum of American History with some fun first graders today and boy am I pooped!  They have so much energy at that age and none of them wanted to stop and look at anything for too long before moving on.  We had a great time though!  While the girls are finishing up their homework, I thought I'd pop on and share a card I made for the most recent SRM Challenge- Birthdays!   I have a few birthdays on my list anyways so last night I pulled out my goodies and made this:


From SRM, you'll see I have some pink twine, the banner stickers from the Valentines We've Got Your Border Sheet and the polka-dotted label from the Bright Blanks Labels by the Dozen sheet.  I mixed my SRM goodies with stamps by Simon Says Stamp and a teal star from the Molly paper pieces by Bella Blvd.  I love how this mix of goodies worked so well together!

If you have time to make a card, the current Birthdays challenge is live through June 4th!  Pop over to the SRM Challenge blog to take a peek!

It's almost Friday!!  I am so looking forward to this weekend- we have nothing planned but I have a few things I'm thinking about doing!  I would love to take a little day trip somewhere!  lol!  Gotta run it by hubby and see what he thinks but wouldn't the beach be nice?? :)

I'm so glad I had a little time to play along this month! :)  Thanks for stopping by to take a peek!


post signature

Monday, March 31, 2014

A Banner Birthday Card

Banner Party Card 1

Hi!  How was your weekend?  Mine was good- pretty quiet because of the rain.  I went to our monthly Stamp Club meeting on Saturday and had lots of fun with my stampy friends!  We also went to our first softball meeting of the season.  We are newbies this year- the girls can't wait to get started!  We've been practicing in our backyard when the weather cooperates and they aren't too bad :)  I think it will be pretty fun!

Let's talk about this card- it was a fun one to make!  The banner die is by Taylored Expressions, the papers are by Lawn Fawn, and the stamps are by Simon Says Stamp.  I really like how they all look together- it turned out bright and fun!

I'm one to buy local if I can so I don't purchase too many things online.  When I saw these new stamps by Simon Says Stamps, I had to make an exception :)  Hee!  I just loved them!  And now that I've tried their products, I am sure to order again- I don't know if I've had a stamp come out so crisp before!  I am impressed!

Banner Party Card 2

Well, hope your week goes well!  I'm busy with mom duties... softball, ballet, after school reading programs... :) Lots of fun stuff!

Thanks for stopping by today!

post signature

Thursday, March 13, 2014

Curing My Blues With A Birthday Card

Hello!  How's your week going?  Mine is a slow one but it's going pretty well.  I'm glad tomorrow's Friday! 

I have a card to share today- it was inspired by Taheerah's Cure for the Monday Blues Challenge #7- Sunny Side Up:


I've been wanting to play along with this challenge since Taheera started it- I can't believe it's been 7 weeks already!  I'm glad I had time to play along!
*Edited to add* So I guess I'm still behind- lol!  I played along with last week instead of this week!  Oops!

Yesterday I had a few minutes to create after the girls went to bed and decided to get out a few of my new Lawn Fawn goodies- I used the Birthday Tags set for this one:

Birthday-Tag-Card

I was inspired by the colors, the woodgrain, and the white-on-white look from the original photo.  I started with a white card base and embossed the front with the Herringbone folder by Teresa Collins Designs for Craftwell.  Next, I stamped a woodgrain pattern onto kraft cardstock and sewed it to the card using my machine.  I stamped and diecut the tag and then added the sentiment and cupcake.  The cupcake was colored with Copics.  I added a little flower sequin from Lawn Fawn for fun!

Birthday-Tag--Card-2

I added a strip of washi and a strip of glitter paper to the card front and then added the tag.  Then I finished it off with the yellow patterned paper stamped with asterisks and the ribbon.

I had fun with this- new stamps, new challenge and a few of my old favorites mixed in too!  Thanks Taheerah for the inspiration!

-tessa


Thursday, March 6, 2014

Grin And Bear It Birthday Card

Hi!  Today is Thursday??  We started the week with a couple of snow days and this is the first day I'm feeling back on schedule.  It still feels like a Monday though! lol!

I have a cute Newton's Nook Designs card for you today- this one uses the cute new Winston's Birthday set:

Bear It Birthday Card 1

I paired Winston with the adorable Into The Woods patterned papers by Lawn Fawn.  I stamped Winston on a diecut journaling card and colored him with Copic markers.  I put two of the sentiments together and stamped them with black ink.  The balloon is paper pieced and added to the card with a foam adhesive dot.   Before I added the journaling card to my card front, I stamped a row of presents over the orange strip of patterned paper and tied a bit of twine in a bow for accent.

I just love Winston!  He makes birthday cards easy to create- I could even use this for a male! :)  In fact, I made this one with a male in mind- today is my stepdad's birthday!  Happy Birthday Bill!

OK!  Hope you have a great day!

-tessa

Monday, January 13, 2014

A Belated Birthday Card

I had a little time today to play along with the most recent Lawnscaping Challenge!  It's all about birthdays this time around and I can always use more birthday cards!  I decided to create a simple card that could be used for boys or girls and came up with this:

Turtle Birthday Card 1

The papers are by Doodlebug Design- the Take Note collection.  I've used the 6x6 pad for this card.  The stamps are from the Year Two set- love that turtle!

Turtle Birthday Card 2

I've colored the turtle with Copic markers.  His present is pieced from patterned paper.  Love how this part of the card turned out!  I wanted to keep it simple and not add twine or anything so I went with the epoxy dots instead, also by Doodlebug.

I'm so glad I got to play along with the challenge!  I need to make about 4 more birthday cards for January so maybe I'll get to add a few more here too! :)

Hope you are enjoying your Monday!

-tessa

Thursday, December 12, 2013

A Sketchy Birthday Card

Today is my mom's birthday!  Happy Birthday Mom!!  I made her a card of course and thought I'd share it here, too!

Chalkboard Birthday 1

I paired Stampin' Up's Sketched Birthday set and Chalk Talk Die-cuts with Pink Paislee's Hey Kid mini pad.  The colors are so fun in this collection!

I diecut the bread tag out of some chalkboard patterned paper and stamped the cake with Versamark ink.  I embossed it using white powder and then added a doodle around the outside edge of the tag as well as a splattering of white mist.  The sentiment is also heat embossed with white on red cardstock and cut out.

Chalkboard Birthday 2

I wish I was spending the day with my mom instead of just sending her a card and gift!  Sometimes it's so hard living far away from family and friends.  Luckily I've made some pretty great friends here in Virginia, too and that makes it a little better...

Anyways, hope you are having a great day and thanks for stopping by!

-tessa


Monday, July 22, 2013

Good Fortune Birthday Card

Good Morning!  Hope your day is off to a good start!  We are busy today but I wanted to pop on this morning and share a card I made recently.  This one used the fun Good Fortune set by Lawn Fawn:


This set is so cute and I love making cards with it!  This time I created a patterned take-out box using some chevron paper from Pebbles, Inc.'s Seen & Noted line.  The background is a journaling box that was part of Echo Park's Snap! line.


I kept the design simple so that I could give it to a man- lol!  It was hard not to over embellish!  I always have a tendency to want bows or something!

Well, hope you have a great day!

-tessa

Monday, June 3, 2013

A little Mosaic Madness for your birthday

Who's excited about the new Stampin' Up! catalog??  I am! :)  I am still finishing up my list of must haves and will be ordering later this week!  Until my goodies come, my friend and demo Keisha let me borrow a few of her new goodies!  I made this card with them over the weekend:


I used the new Mosaic Madness set for this card. On a white cardstock panel, I stamped the border to vertically to look like banners. Next, I added cardstock banners in the same colors. Lastly, I added the sentiment from the new Banner Greetings hostess set and embellished it with rhinestones, linen thread and crochet trim. I matted my panel onto Marina Mist cardstock using dimensionals and adhered it to a white cardbase that had been embossed using the new Modern Mosaic embossing folder.


There are a lot of great stamps in the Mosaic Madness set!  There is even a punch to match!  It's on my list for sure!

If you have a list and would like to add to my party, I have an online hostess code you can use- I'll be finishing up my order late on Wednesday, June 5th. If you order, it will go straight to your house so no need to worry about second shippings or anything! I love this online party thing! To shop my party please head to Keisha's store. Enter this JTA3WWV9 into the hostess code box when you check out.

Well, hope you are having a great day!  Thanks for stopping by to see what I made today!

-tessa

Monday, May 6, 2013

Make a Wish Card

Hi!  Happy Monday! :)  I spent the morning running errons and am just now settling down for some nice hot tea and oatmeal.  And after I type this out, I'm going straight to my craft desk to make some special cards for Teacher's Appreciation Day tomorrow!  Not a bad way to spend a Monday if you ask me!  Hee!

Today I thought I'd share a card I created this card a few weeks ago at my stamp club meeting.  My SU! demo Keisha created a pretty sample card using these supplies and of course, I had to put my own little spin on it:


Isn't this a fun color scheme?  I love gray and yellow and blue together!  Keisha has a great eye for color! :)  The sentiment stamp is stamped in Basic Gray on to the new canvas paper.  I tore the top and bottom edge to create the fraying- it has to be my favorite thing about this product!  Keisha brought along her scoring tool and the new templates that fit into it so that we could dry emboss on our backgrounds.  I used the chevron pattern and like how it turned out.

OK- going to keep this short today so I can go play!  Lol!  Hope you have a great day and I'll be back tomorrow with some of my Teachers Appreciation Day cards!

-tessa

Tuesday, April 9, 2013

He Said, She Said Cards

Hi!
I have some fun cards to share with you today but first, I wanted to say thank you for all your comments and well wishes here on my blog, on Facebook, on Teresa's blog, and in my email box!  It means a lot to have you all cheering for me and now I'm even more excited to get started on some fun things for Teresa Collins Designs.

So I was on a mission to create some masculine cards for my stash when I made these.  I used patterned papers from both He Said, She Said 6x6 pads, the He Said, She Said sticker sheet, and enamel dots from the Memories and Far Away line.

For this one, I was inspired by the confetti trend that is going on.  This would by my take of a many confetti card:


I chose patterns that were simple and more muted.  You can see I kept my embellishments simple, too- I always want to go for busier embellishments but for a man, you really can't!  I added some linen thread to the top, finishing it with a simple knot.  I added epoxy dots and a little Mr. Huey Calico Shine spray randomly into my confetti.


You can see some of the sparkle that the Shine spray adds... still manly but fun, too!

This next card is pretty masculine but really could work for anyone:


After I created my card base, I embossed the bottom third with my polka-dot folder.  Next, I added the hexagon stickers and my sentiment.  I flicked a little Shine spray on this one, too and again added a few epoxy dots for accent.  I finished with the baker's twine and decided to go with a bow.


Masculine cards have always been a tough one for me and I'm happy to have two more to add to my stash!

Well, thanks for stopping by today!  I'm going to get busy on some house cleaning- I did a great job yesterday with ignoring it and now I'm paying!  lol!

-tessa

Friday, February 15, 2013

Big Banner Birthday Card

Hi there!  I'm so glad that Friday is here again!  My hubby and I snook out to a movie this morning after we dropped the girls off at school for a little Valentine's date!  Hee!  We had a fun time and Identity Thief was hilarious!

If you didn't stop by yesterday and would like a chance to win an awesome prize package from SRM Stickers, please pop over to my Made with Love post and leave a comment.  The giveaway will be closed on February 21st.

Well, today I have a birthday card to share with you:


The large banner was made with a fun Jenni Bowlin stamp I've had in my stash for awhile now.  I stamped them onto colored cardstock using Versamark and embossed them with white embossing powder.  The cupcake was made using the Create a Cupcake stamp and matching punch.  I added a sticker button with a twine bow to finish it off.  The sticker button as well as the sentiment are from the Walnut Grove stickers by Pebbles, Inc.

This one was a lot of fun to make- because of the heat embossing!  I just love watching the powder melt and turn shiny!  Hee!  I might have to get that out again tonight!

Well, I hope you have a great weekend!  I'm planning a fun card making day with my Stampin' Up! friends on Saturday and I can't wait!!

-tessa

Wednesday, January 30, 2013

CAS Birthday Card for a Boy...

Hello!  I was in such a good mood yesterday, I decided to join in the fun of the Clean and Simple Card Class 2!  It is the second class I've taken with Online Card Classes and I love their set up.  Their teachers and guest designers are the best, too!  I started the class a day behind but I am in no hurry to catch up!  Their first day alone has inspired me so much!

There were three great sketches to choose from for homework and I chose Jennifer's look:


I've used the Trendy Teen set by The Craft's Meow (thanks Anita!) with some manly ink colors to create this look.  I stamped the paint swipe in different colors and then added the sentiment with white embossing powder.  In the case of this card, CAS was also super fast!  I created a handful of these to have on hand for a few of the many men I need to send birthday cards to this year.

Like I said above, I've been so inspired by this class so far- I think I'll go create another look using one of the other sketches!  Thanks for peeking today!

-tessa

Tuesday, January 29, 2013

An Overdue Birthday Card

Hi there!  Today is a beautiful day here in Northern Virginia!  The sun is shining and it has had a wonderful impact on my mood- I'm feeling so good today!  I am inspired, too so hopefully I can get some creative time in before the girls get home from school.

I am one of those people who is always late sending birthday cards out!  Today's card is proof of this- hee!  Here it is:


I've used the Dewey Decimal set from Lawn Fawn and paired it with the pretty papers from Pebbles Seen & Noted line.  This stamp set is so clever!  I have a lot of friends who love to read so I should get lots of use out of it.

Well, I'm going to keep this post short and get started on the rest of my day!  Hope you have a great one, too!

-tessa

Monday, January 7, 2013

A Birthday Card

I've been trying to get a head start on some birthday cards to use through out the year.  I made this quick one to add to my stash:


Goodies:
Stamps: Wacky Wishes set by Stampin' Up!
Ink: Black Onyx Versafine ink
Paper: Basic Gray, Lucky Limeade cardstock by Stampin' Up!; Seen & Noted 6x6 pad by Pebbles Inc.
Accessories: Red baker's twine by We R Memory Keepers

I have lots of nephews to wish happy birthday so I am in need of boy cards- something that is so hard for me!  I tried to let the patterned papers do most of the work here and left the other elements simple so they wouldn't end up too frilly.

Well, I've got lots to do today!  Hope you enjoy your Monday!

-tessa

Tuesday, January 1, 2013

Happy New Year!

I'm sure it will take a few weeks of writing it to get used to the idea that 2013 is here!  Hope you had a wonderful night last night, ringing it it- did you stay up?  We had our New Year's celebration at 10pm- after an evening filled with many games, ice cream sundaes, and a visit from our good friends.  The girls loved the count down and clinking their fancy glasses full of sparkling cider!

Now I am just thinking over some goals for myself in the new year.  I have one- an important one, too.  It is to find some direction.  I have been feeling a little lost lately, both on my blog and in my personal life.  It is weird how things change and you find yourself saying what was I doing again?  lol!  Luckily, no drama is a part of my reasons for being lost.  I think it has to do with my girls going to school full time.  I have been board at home ever since... I need to figure out what to do next.

As for my blog, I think I've been a little lost since I stopped being a Stampin' Up! demonstrator.  It has taken a long time for me to find my spot here- what stamps I like, what style I like, what I like to make... I am feeling much more confident going into this year that I will have something worthwhile to contribute to blog land!  I may not have a 'home' like I did with Stampin' Up! but I am feeling content in where I am now.

One thing I will be doing this year is learning some new skills.  I am planning to focus on something different every month and learning all I can in that field.  For January, I am focusing on family history research.  I have done a lot of my research all ready but I really want to focus on it and learn all I can through the internet.   When I go back to Seattle over the summer, I am planning to scan as many old pictures and documents as I can as well as record some of the stories my grandparents tell me.

I haven't made plans for each month but maybe later today I will make a little list of the things I'd like to learn  more about.

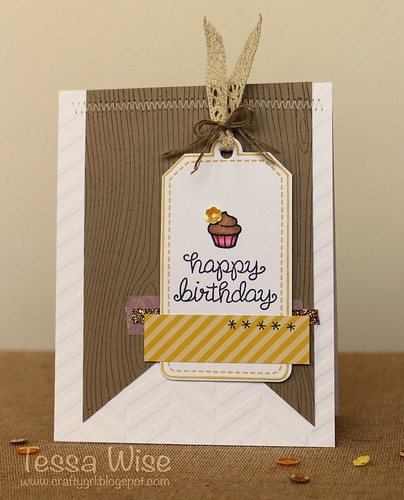
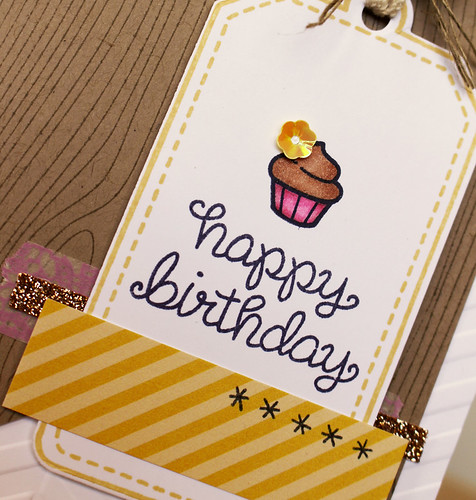
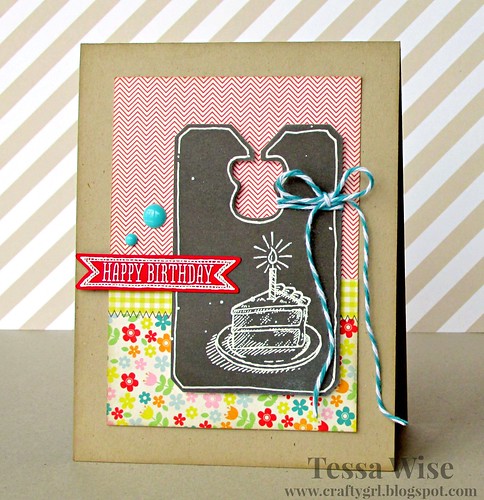
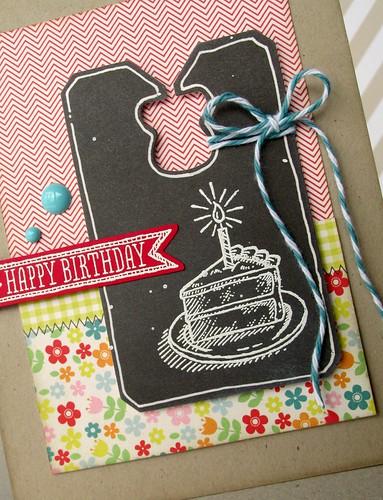
Well, after all those deep thoughts, I guess I should share a card!  I made this card yesterday with a new stamp set I received from my secret santa:


Goodies:

stamps: Picnic set by Basic Grey/ Hero Arts; Hey Day Sentiments by Studio Calico/ Hero Arts
ink: Memento ink in Tuxedo Black
paper: Naturals White, Basic Black cardstock by Stampin' Up!; pink cardstock by Bazzill Basics; patterned paper from Hip Hip Hooray line by Pebbles, Inc
accessories: Copic markers, Dazzling Details and Scallop edge punch by Stampin' Up!

I have been trying to practice my coloring more and here I used some new Copic markers I picked up over the weekend.  I am lucky to have a couple of friends who really know their stuff when it comes to Copics and I am hoping they will teach me all their tips and techniques!

A Blog Named Hero is challenging us this week to use something new and since I got this set for Christmas, I thought I'd link up!  If you have time be sure to check out their current challenge.

Well, I hope you are enjoying the first day of the new year and thank you for stopping by my blog today!  Sorry if reflections aren't your thing... I promise to not do it too often! :)

-tessa
 
site design by designer blogs